Learn how to buy Pinto.
Simple and easy.
If you’re already familiar with crypto take a look at the step summary below. And if you’re newer to crypto we’ll explain each step in detail later on.
Don’t want to read?
Check out our quick guide.
How to buy pinto:
a step by step guide
Here we’ll walk through each step in the fast track guide in detail. You don’t need any crypto experience to follow this guide and eventually buy pinto. You’ll want to have your phone, computer, license, and debit card handy.
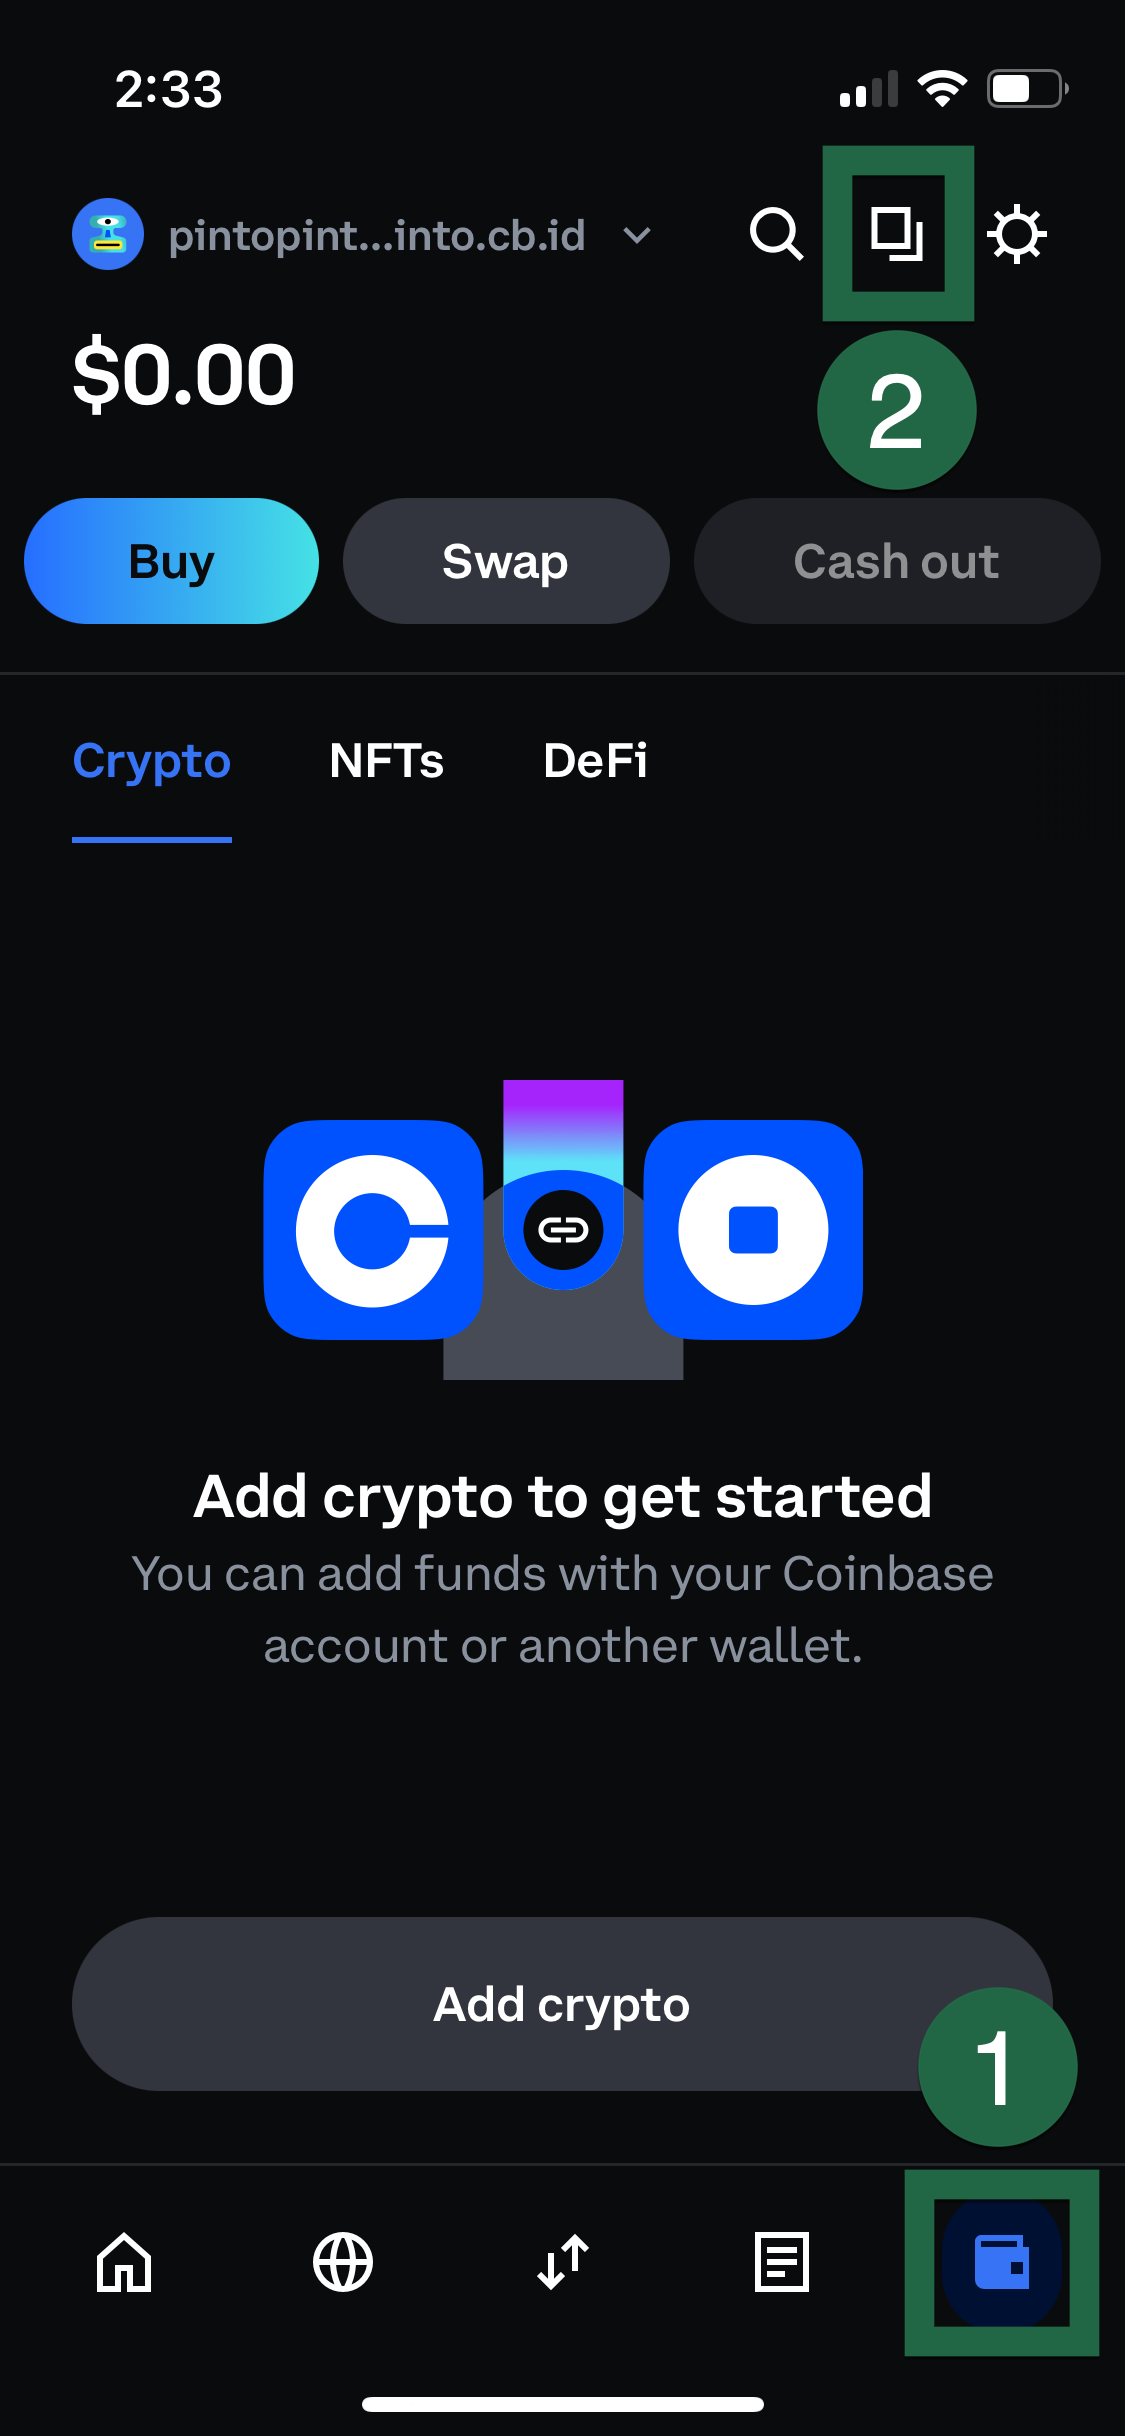
Set up or log into your coinbase crypto wallet

To buy pinto, you’re going to need a wallet with assets to swap for pinto. The wallet also serves as a place to hold the pinto once swapped. There are multiple wallets out there, one common wallet is the coinbase wallet. You can learn more and download the coinbase wallet at this link. If you already have a different wallet that’s okay, many different wallets can be used to buy and hold pinto.
Follow the setup instructions in the app. The app does a good job of walking you through the account creation process. Make sure you store your recovery phrase in a safe place. If you get stuck here, check out this coinbase support article on creating a wallet.
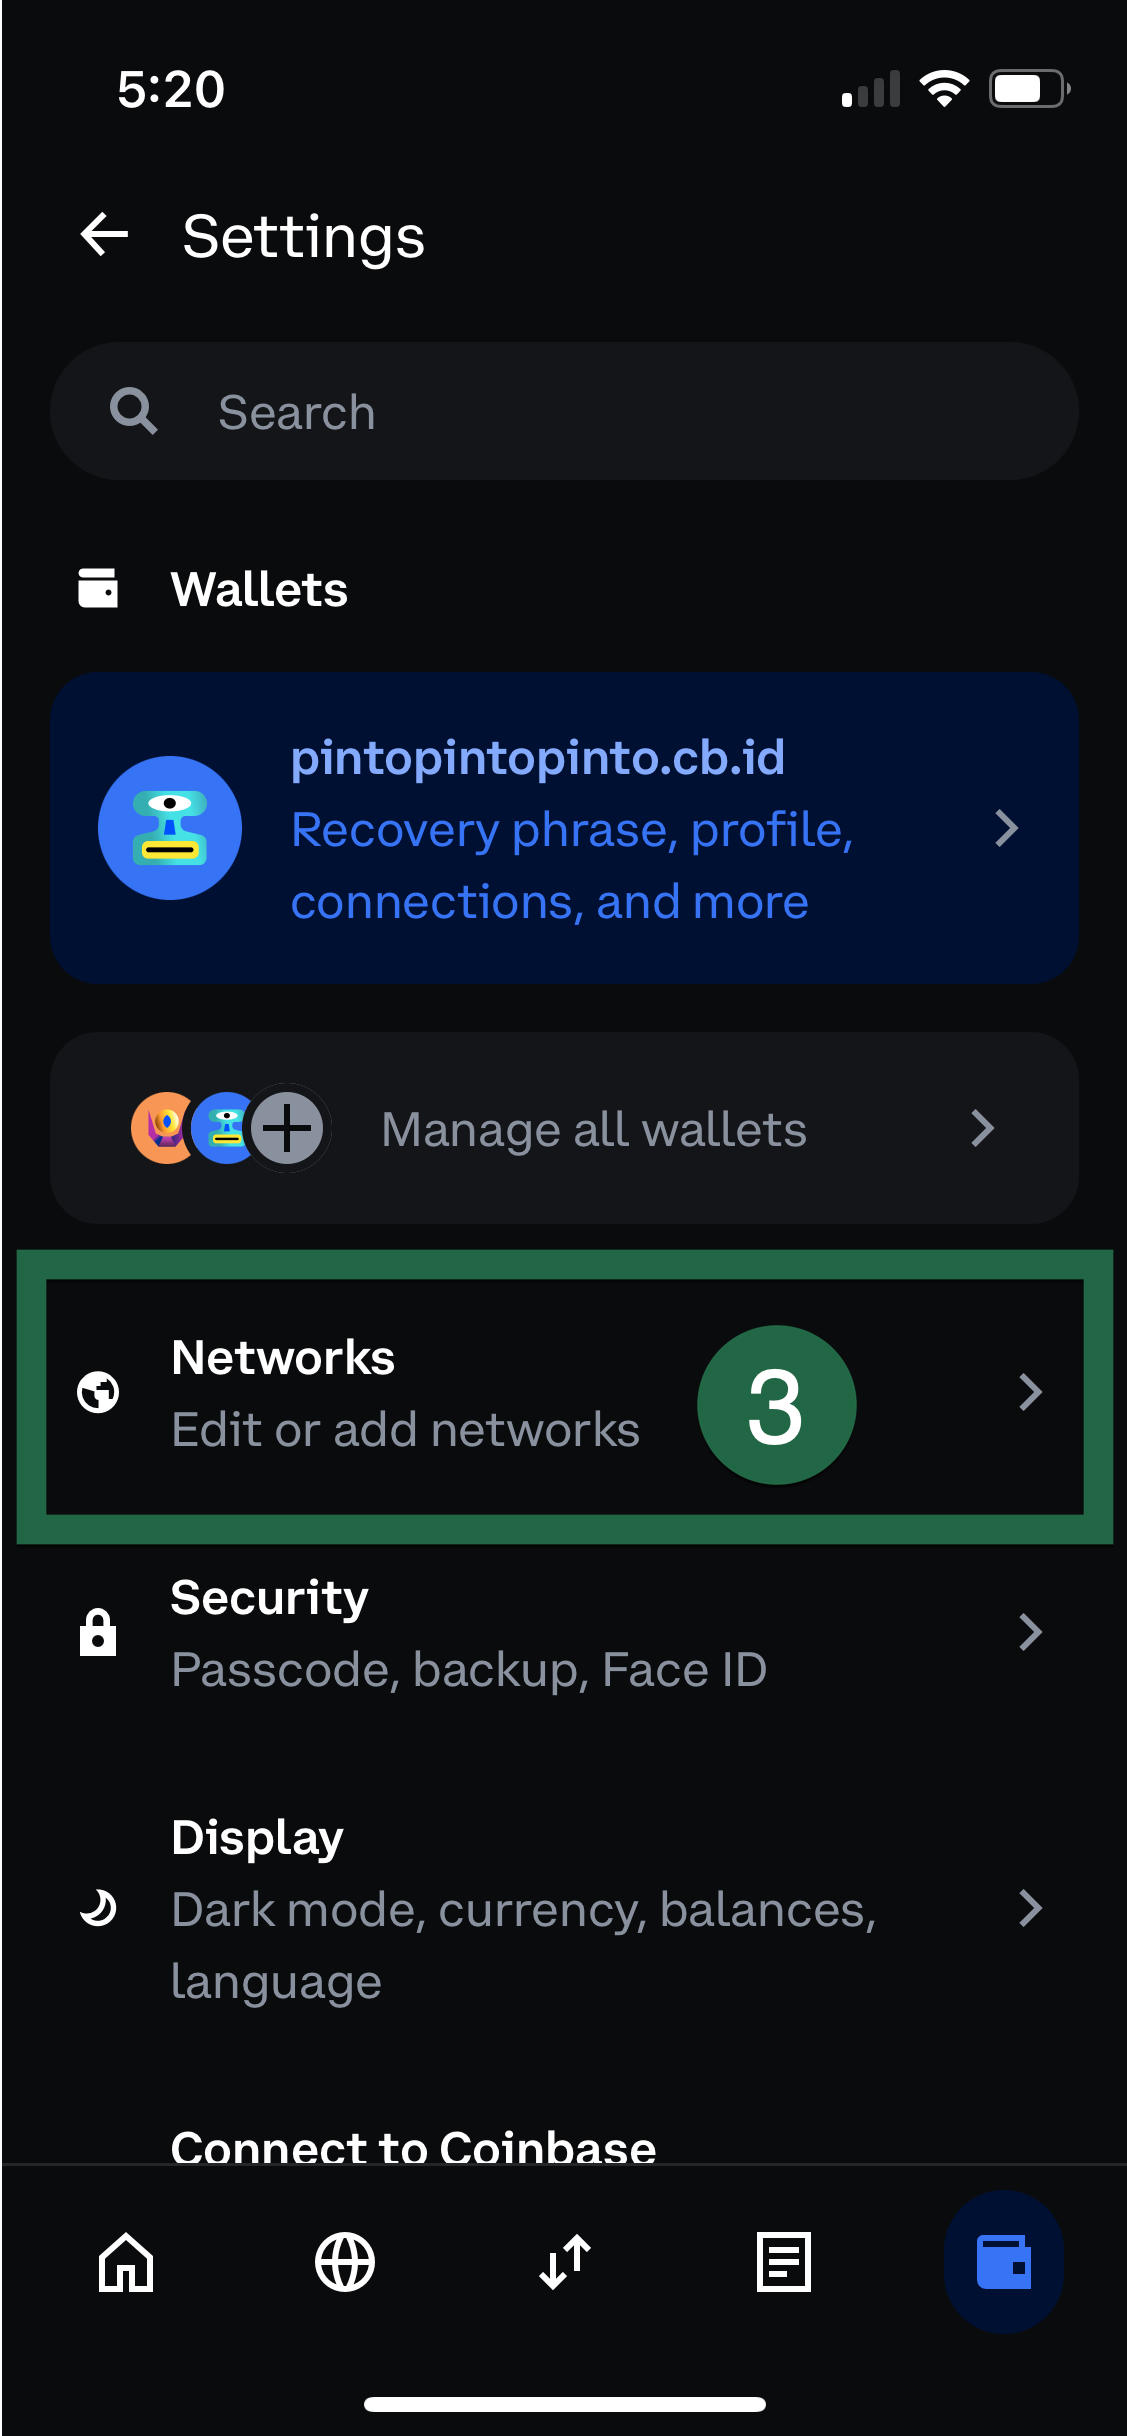
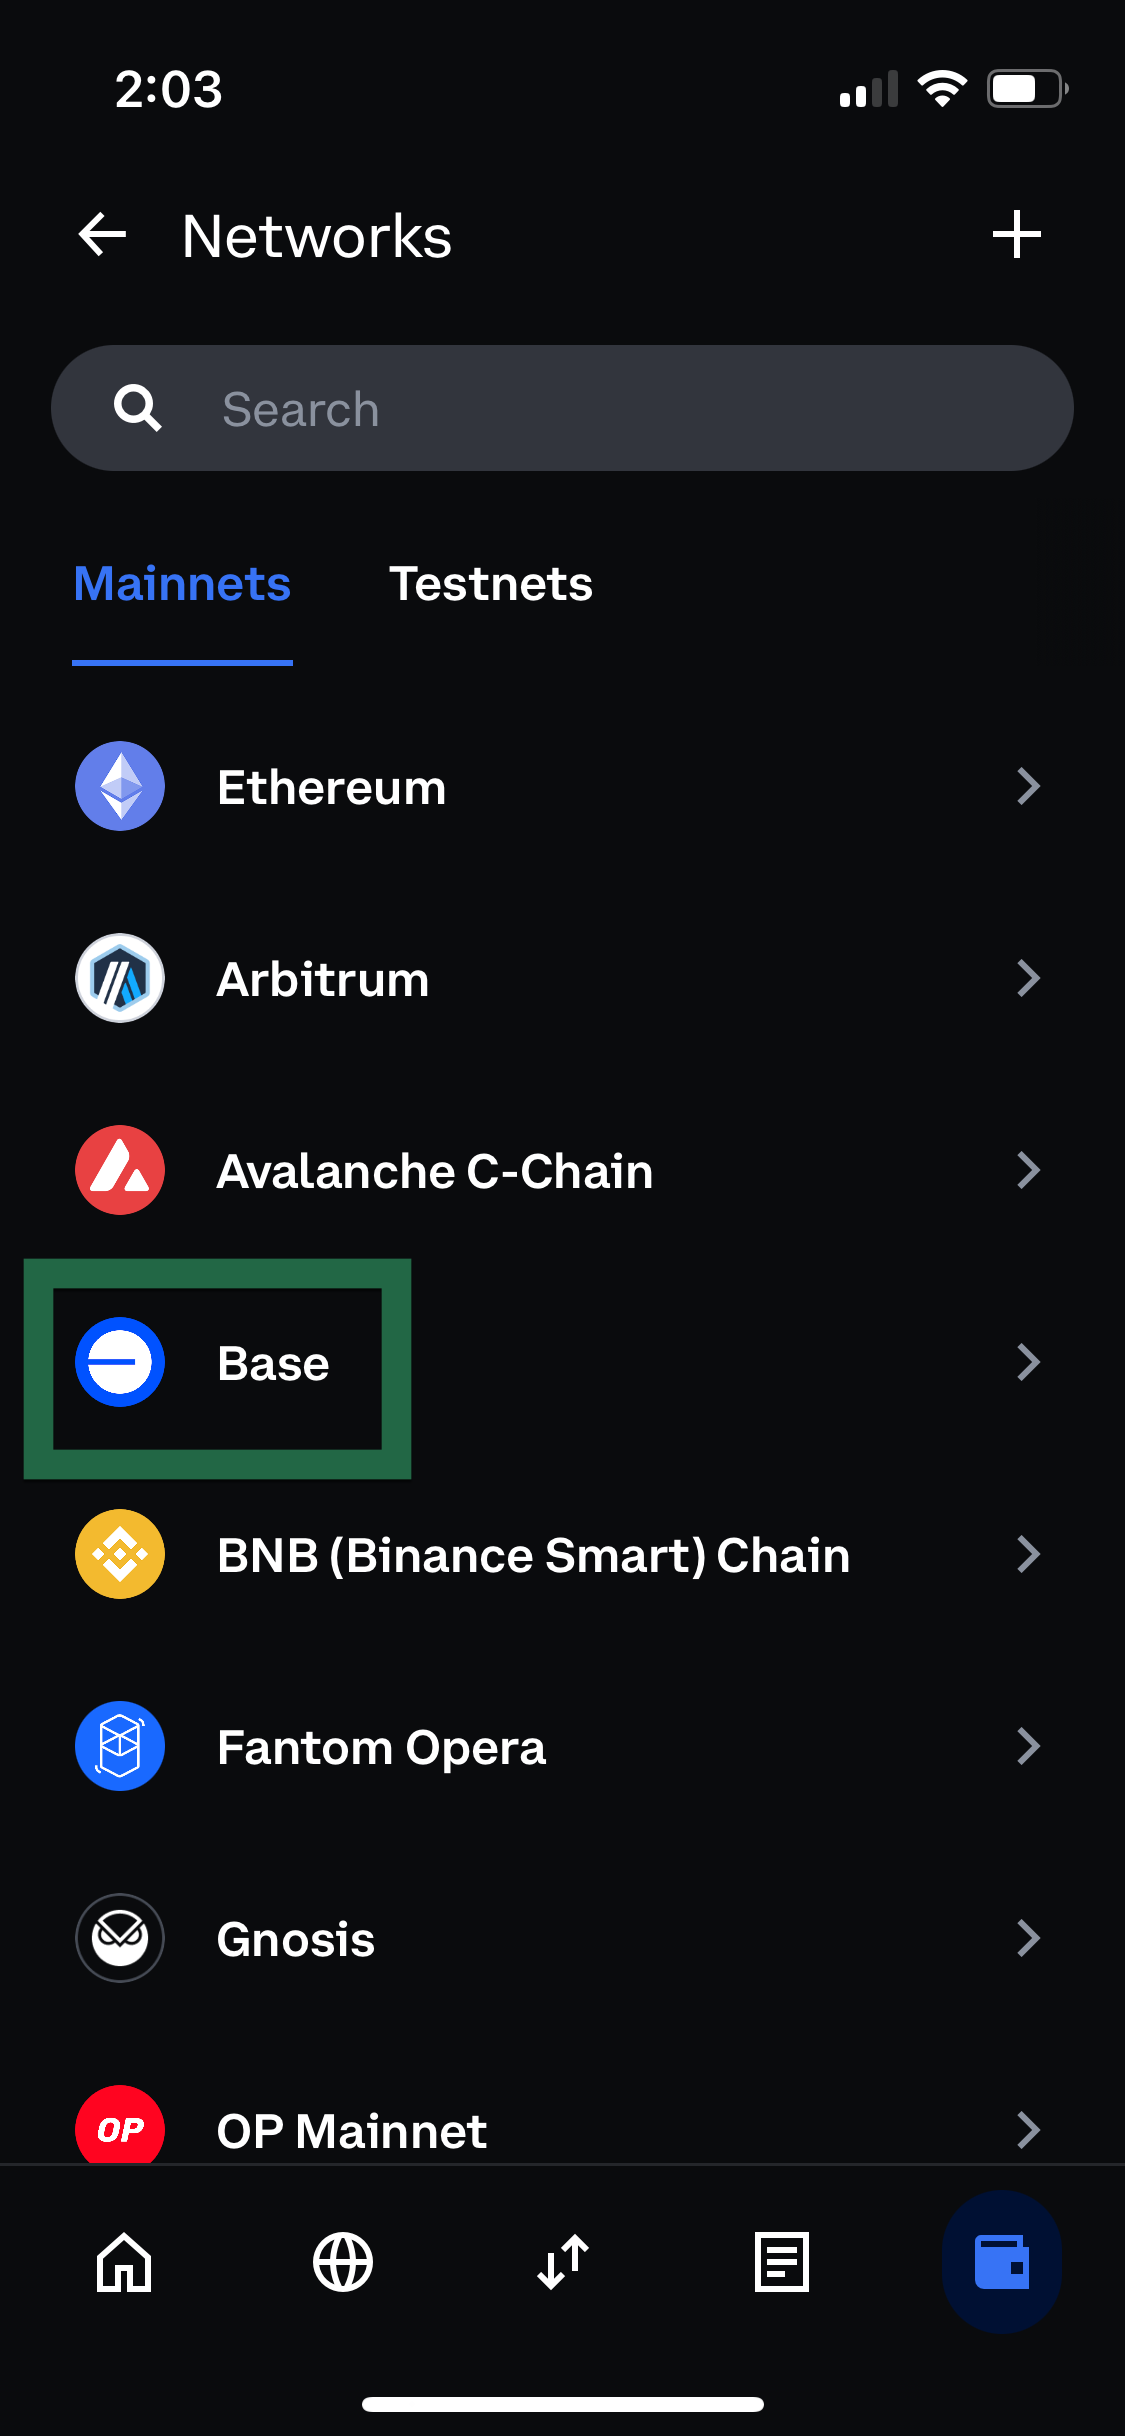
Once you’ve set up your wallet, ensure you have the base network, this comes pre-configured by default, but it’s good to double check because we’ll be using the base network later on. If you see Base on your list of networks you’re good to go.
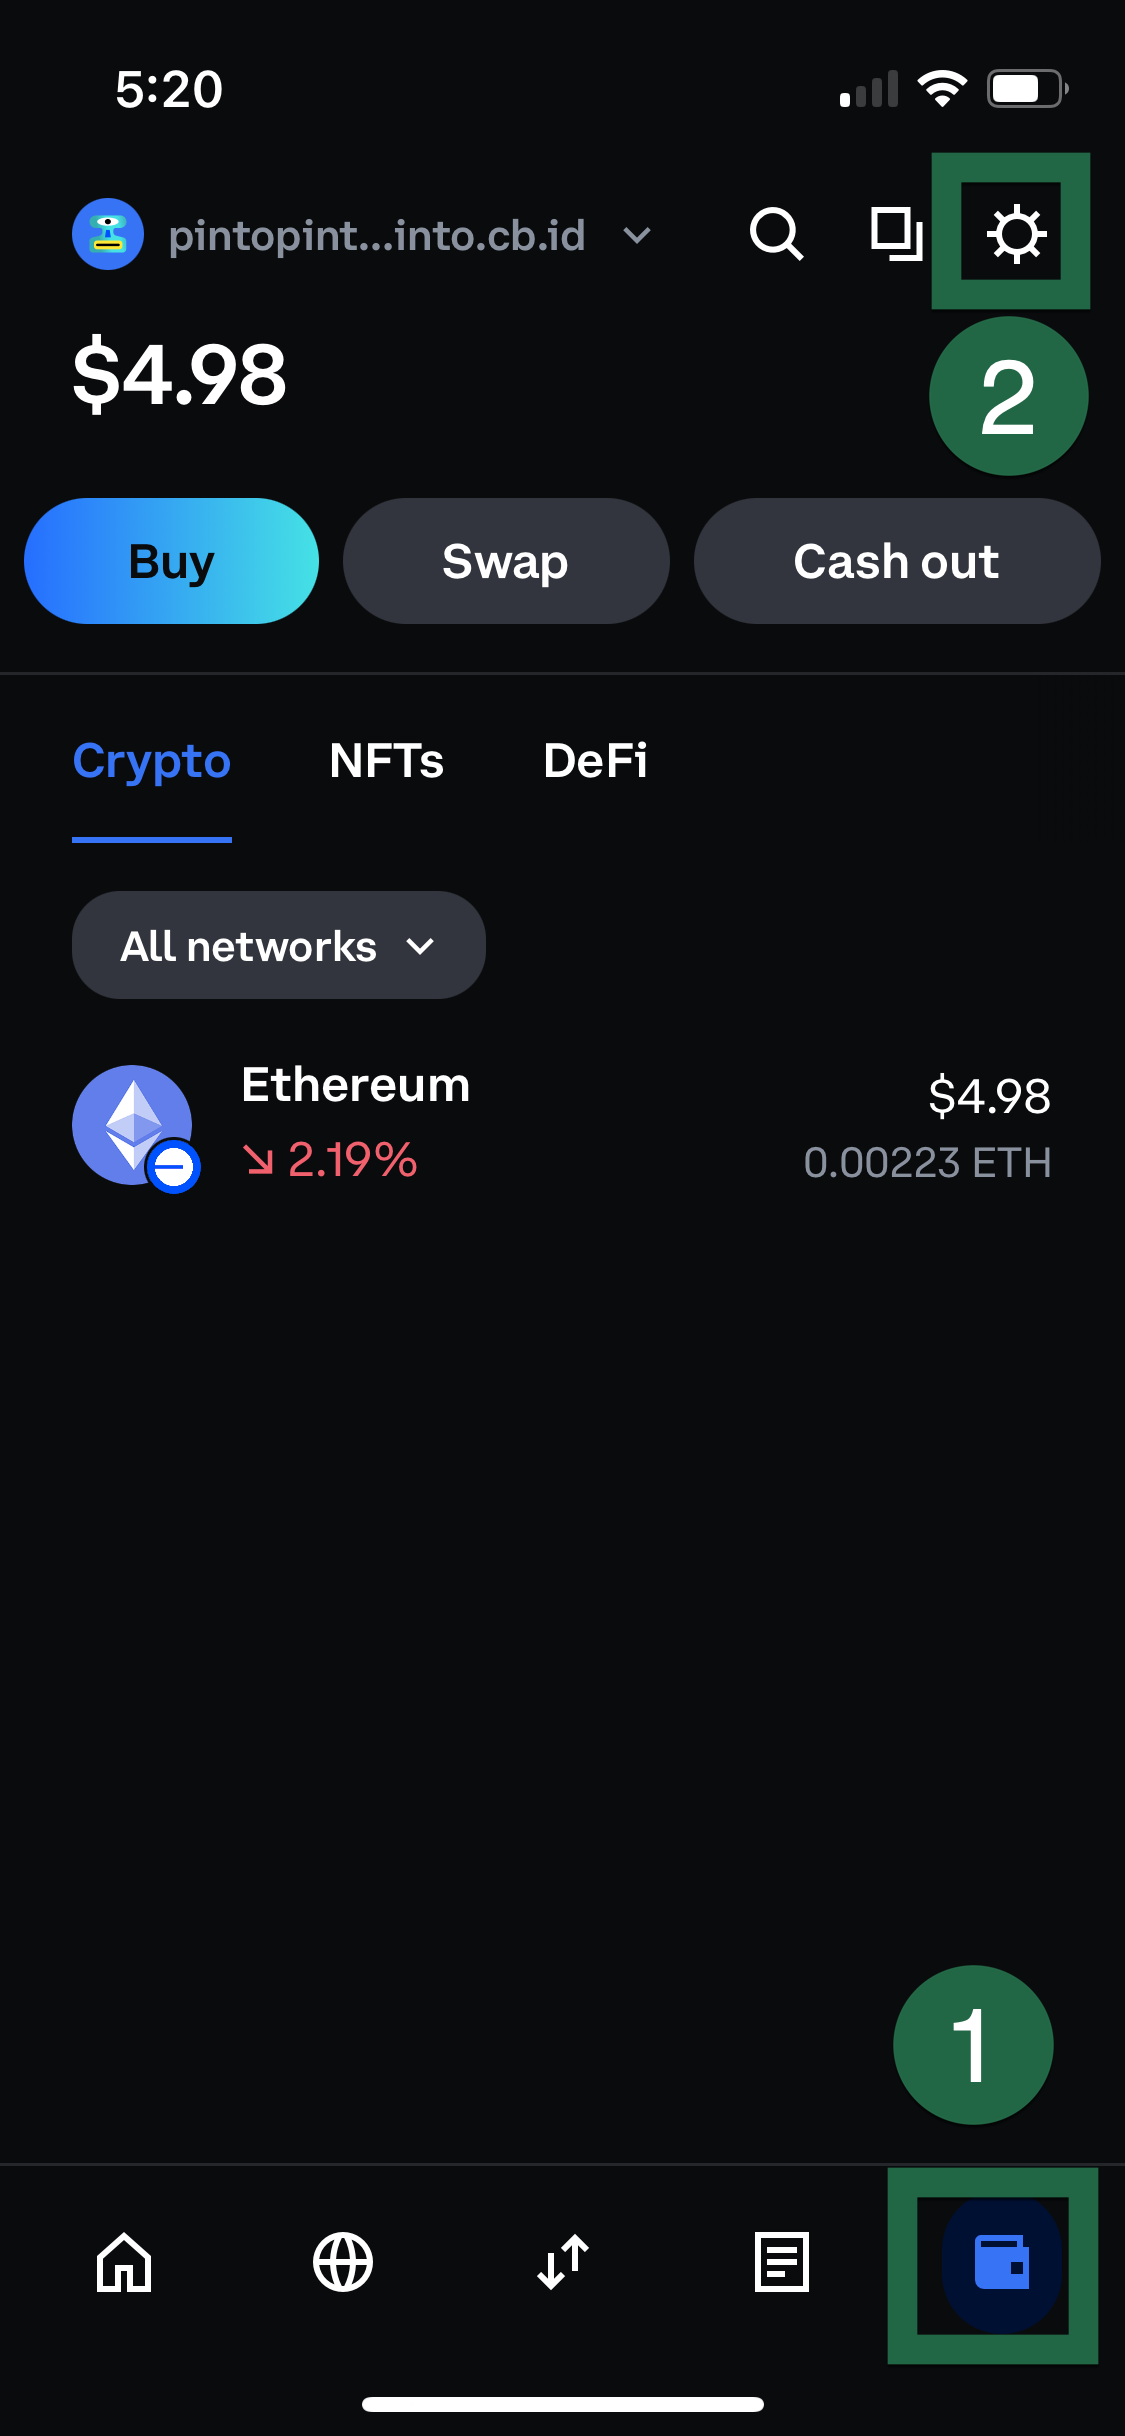
With your wallet set up, it’s time to move on to the next step.
Set up a Coinbase Exchange account
Next, you’ll need to create a Coinbase Exchange account. Download the coinbase app, click Sign Up, then follow the instructions. You can also use coinbase.com if you prefer a website experience. However, we’ll use examples from the app later on in the guide.
You will want to verify your identity using your license to ensure you can transfer funds instantly.
We recommend setting up two-factor authentication for increased security.
Next, link your debit card. If you use a debit card your funds can be available for transfer instantly. If you don’t want to use a debit card, you can also link a bank account. Keep in mind with a bank account it may take 3-5 days before you can transfer funds.
Purchase USDC on Coinbase Exchange

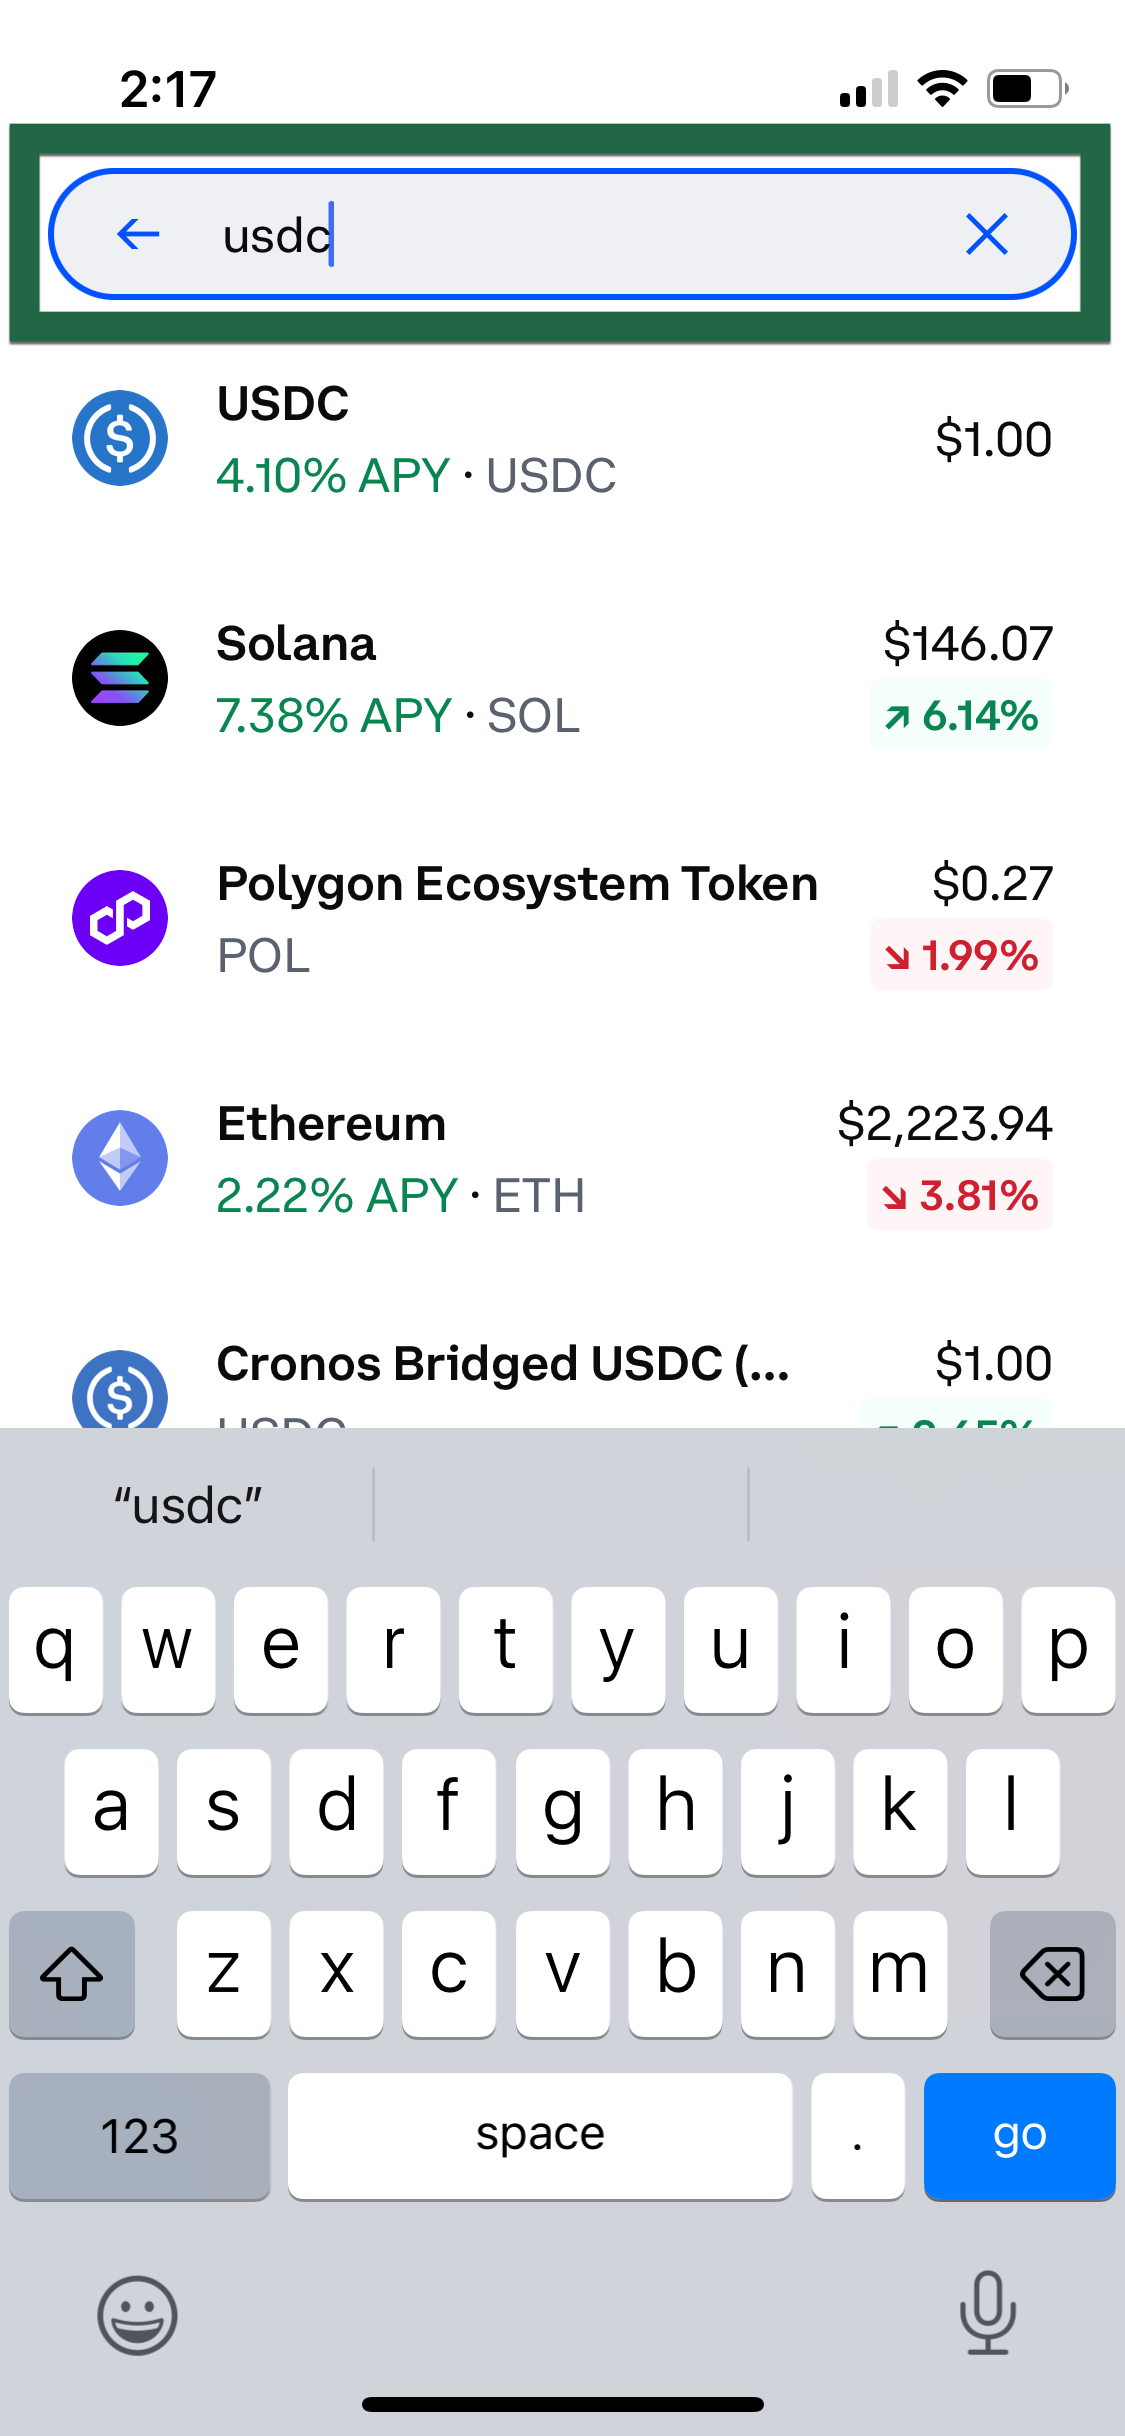
To buy pinto, you are going to need a coin to fund the purchase. Using USDC is the least volatile way to purchase pinto because the underlying value of USDC stays relatively stable. Some other coins can also be used. We’ll detail these in another blog post. This step is all about purchasing the USDC you need to buy pinto in the later steps.
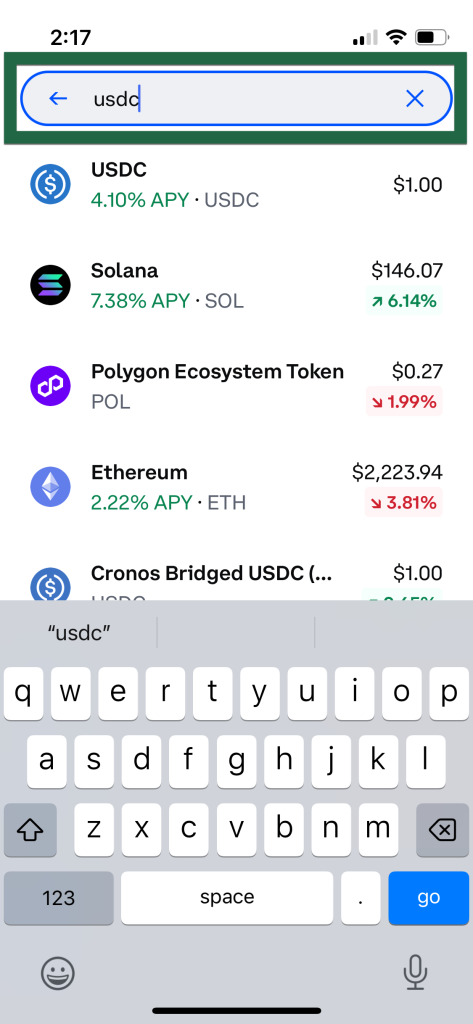
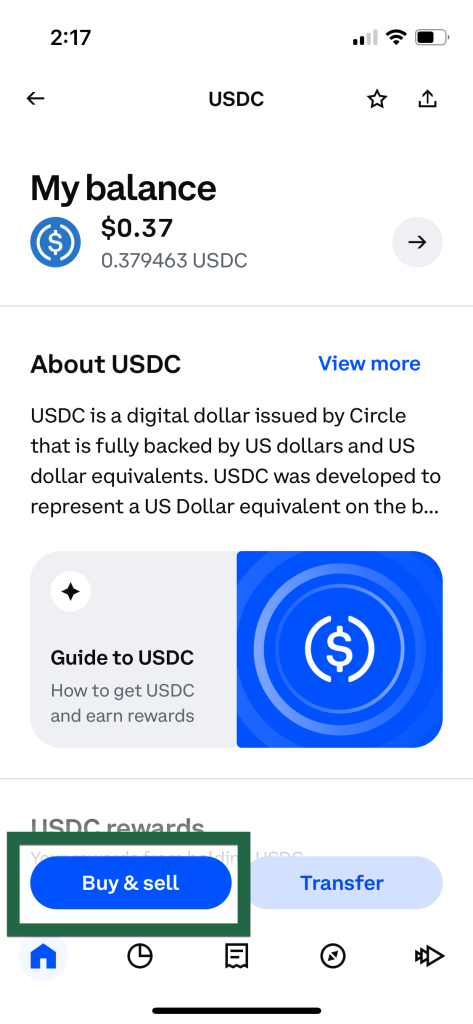
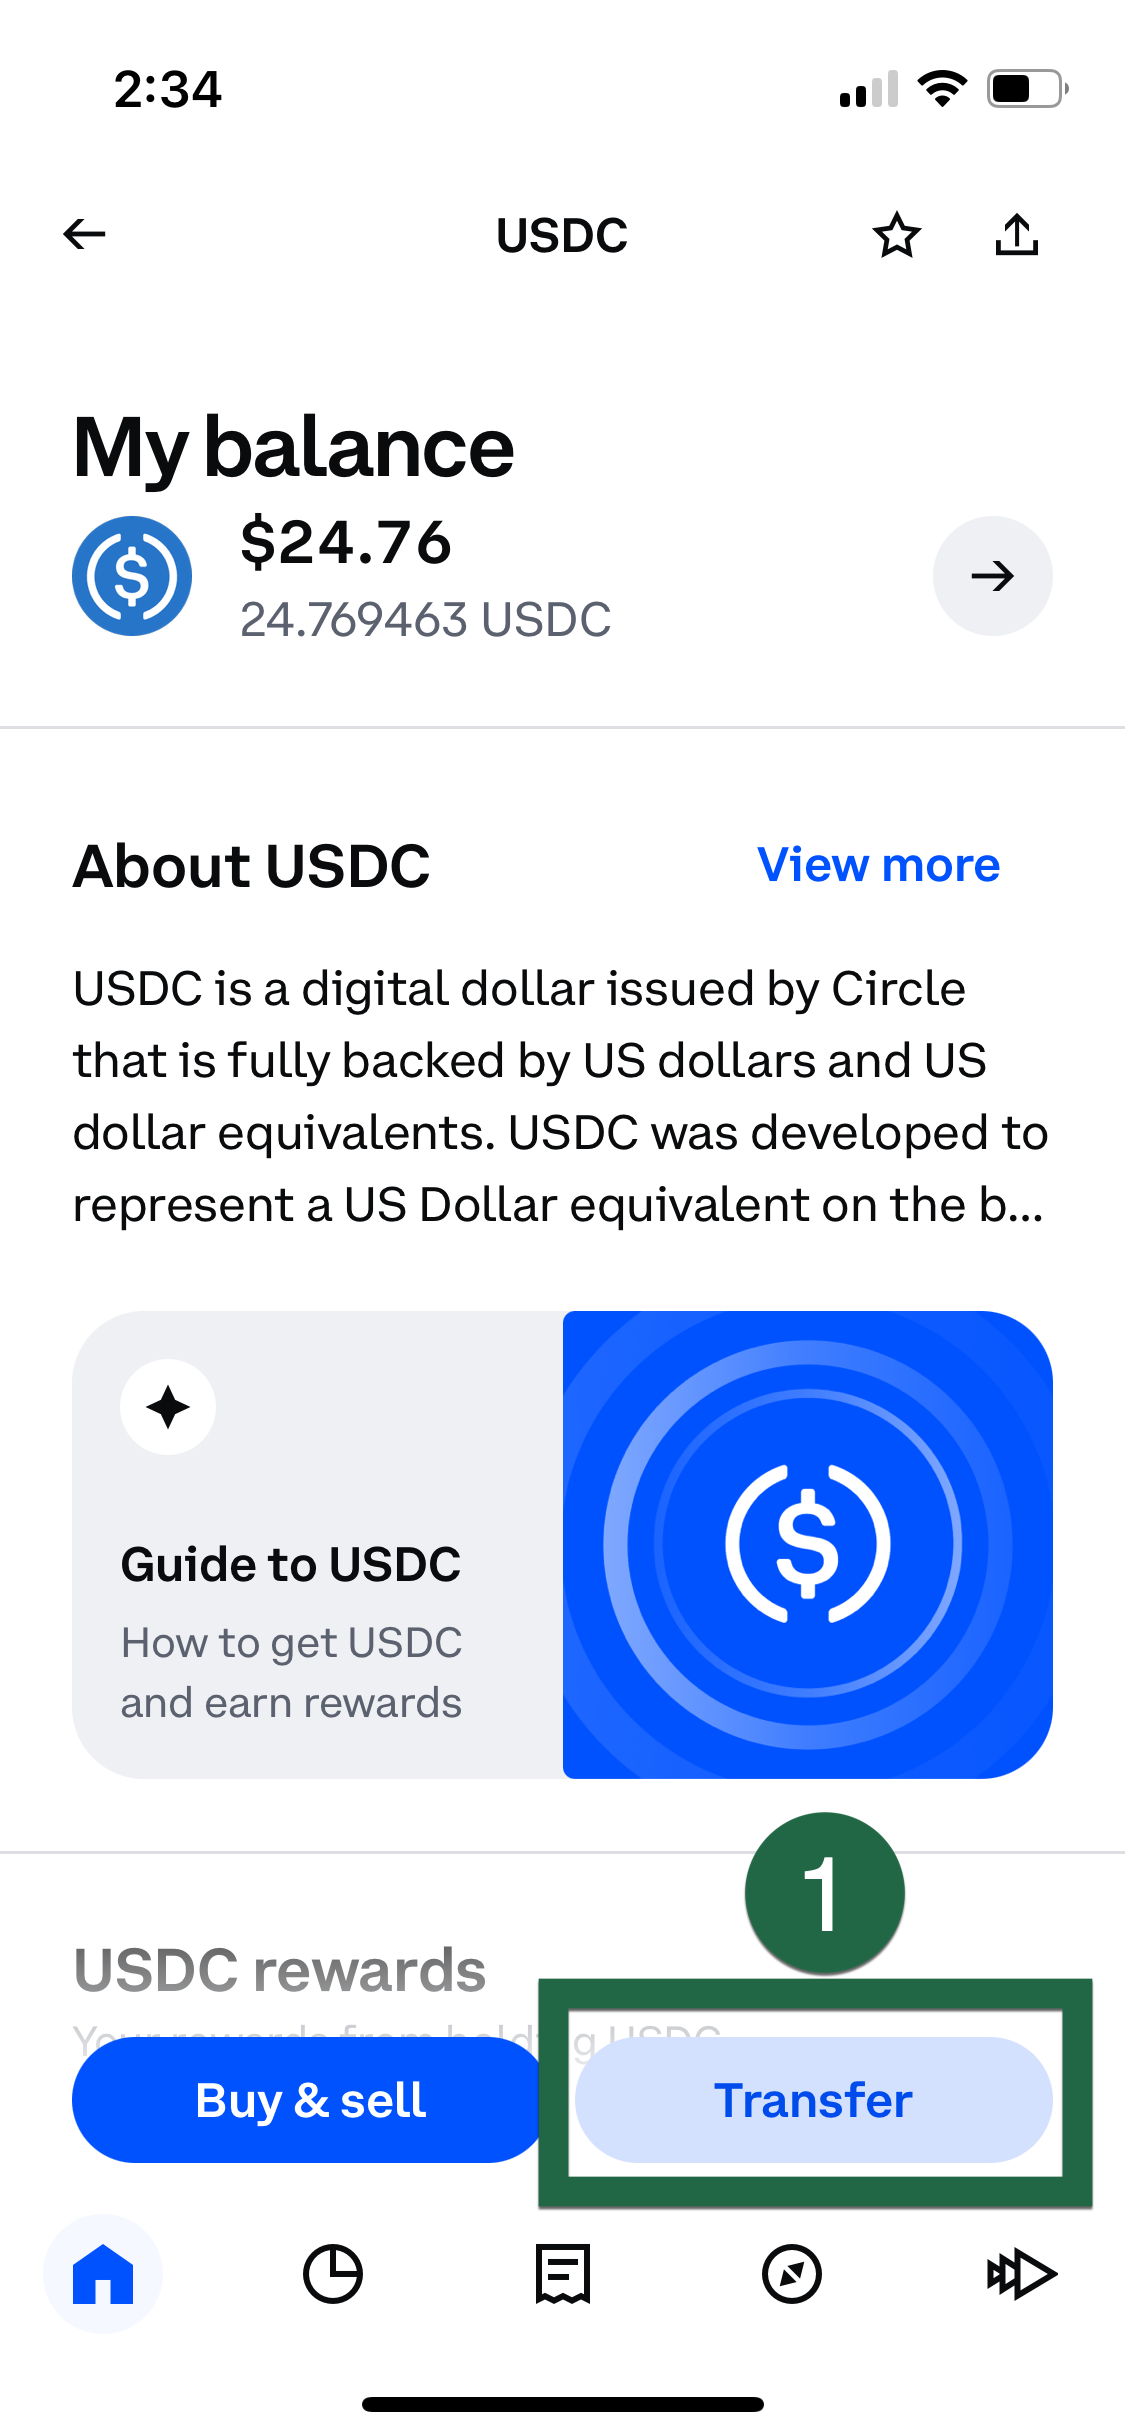
In your Coinbase app, search for USDC in the search bar at the top. Tap USDC, then tap Buy & sell.
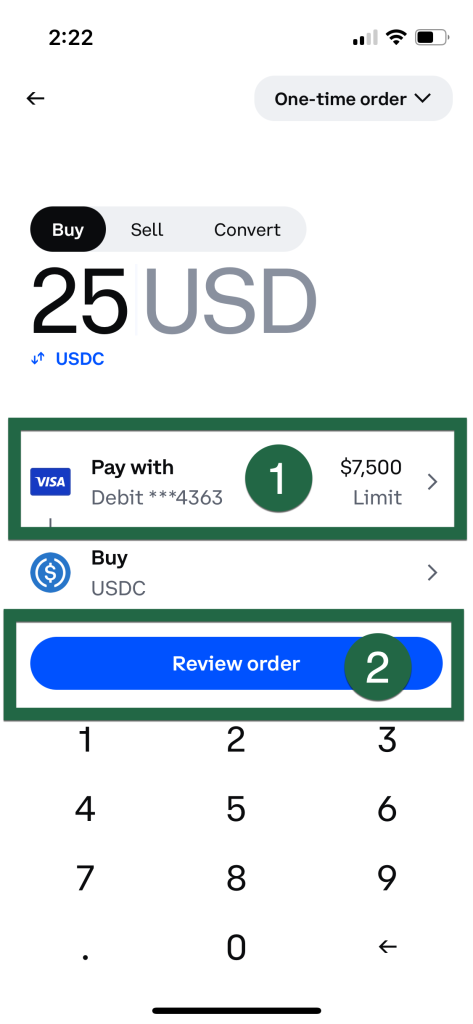
Put how much USDC you want to buy, make sure your payment method is set to your debit card, then tap Review Order. On the next screen, tap Buy Now.
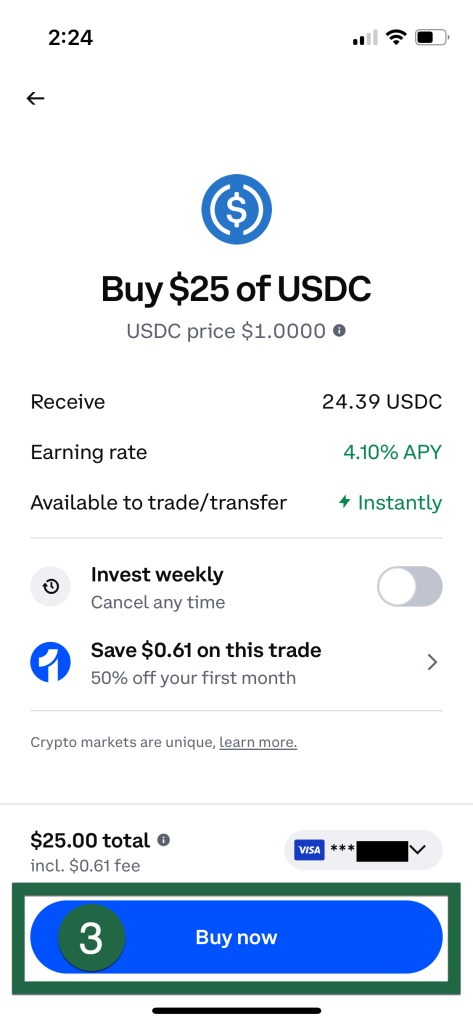
You may notice that coinbase takes a small fee. Due to this the amount of USDC you get will be slightly less than the number you entered on the buy screen.
Transfer USDC to your wallet
Next, you need to get your USDC into the wallet you created earlier.
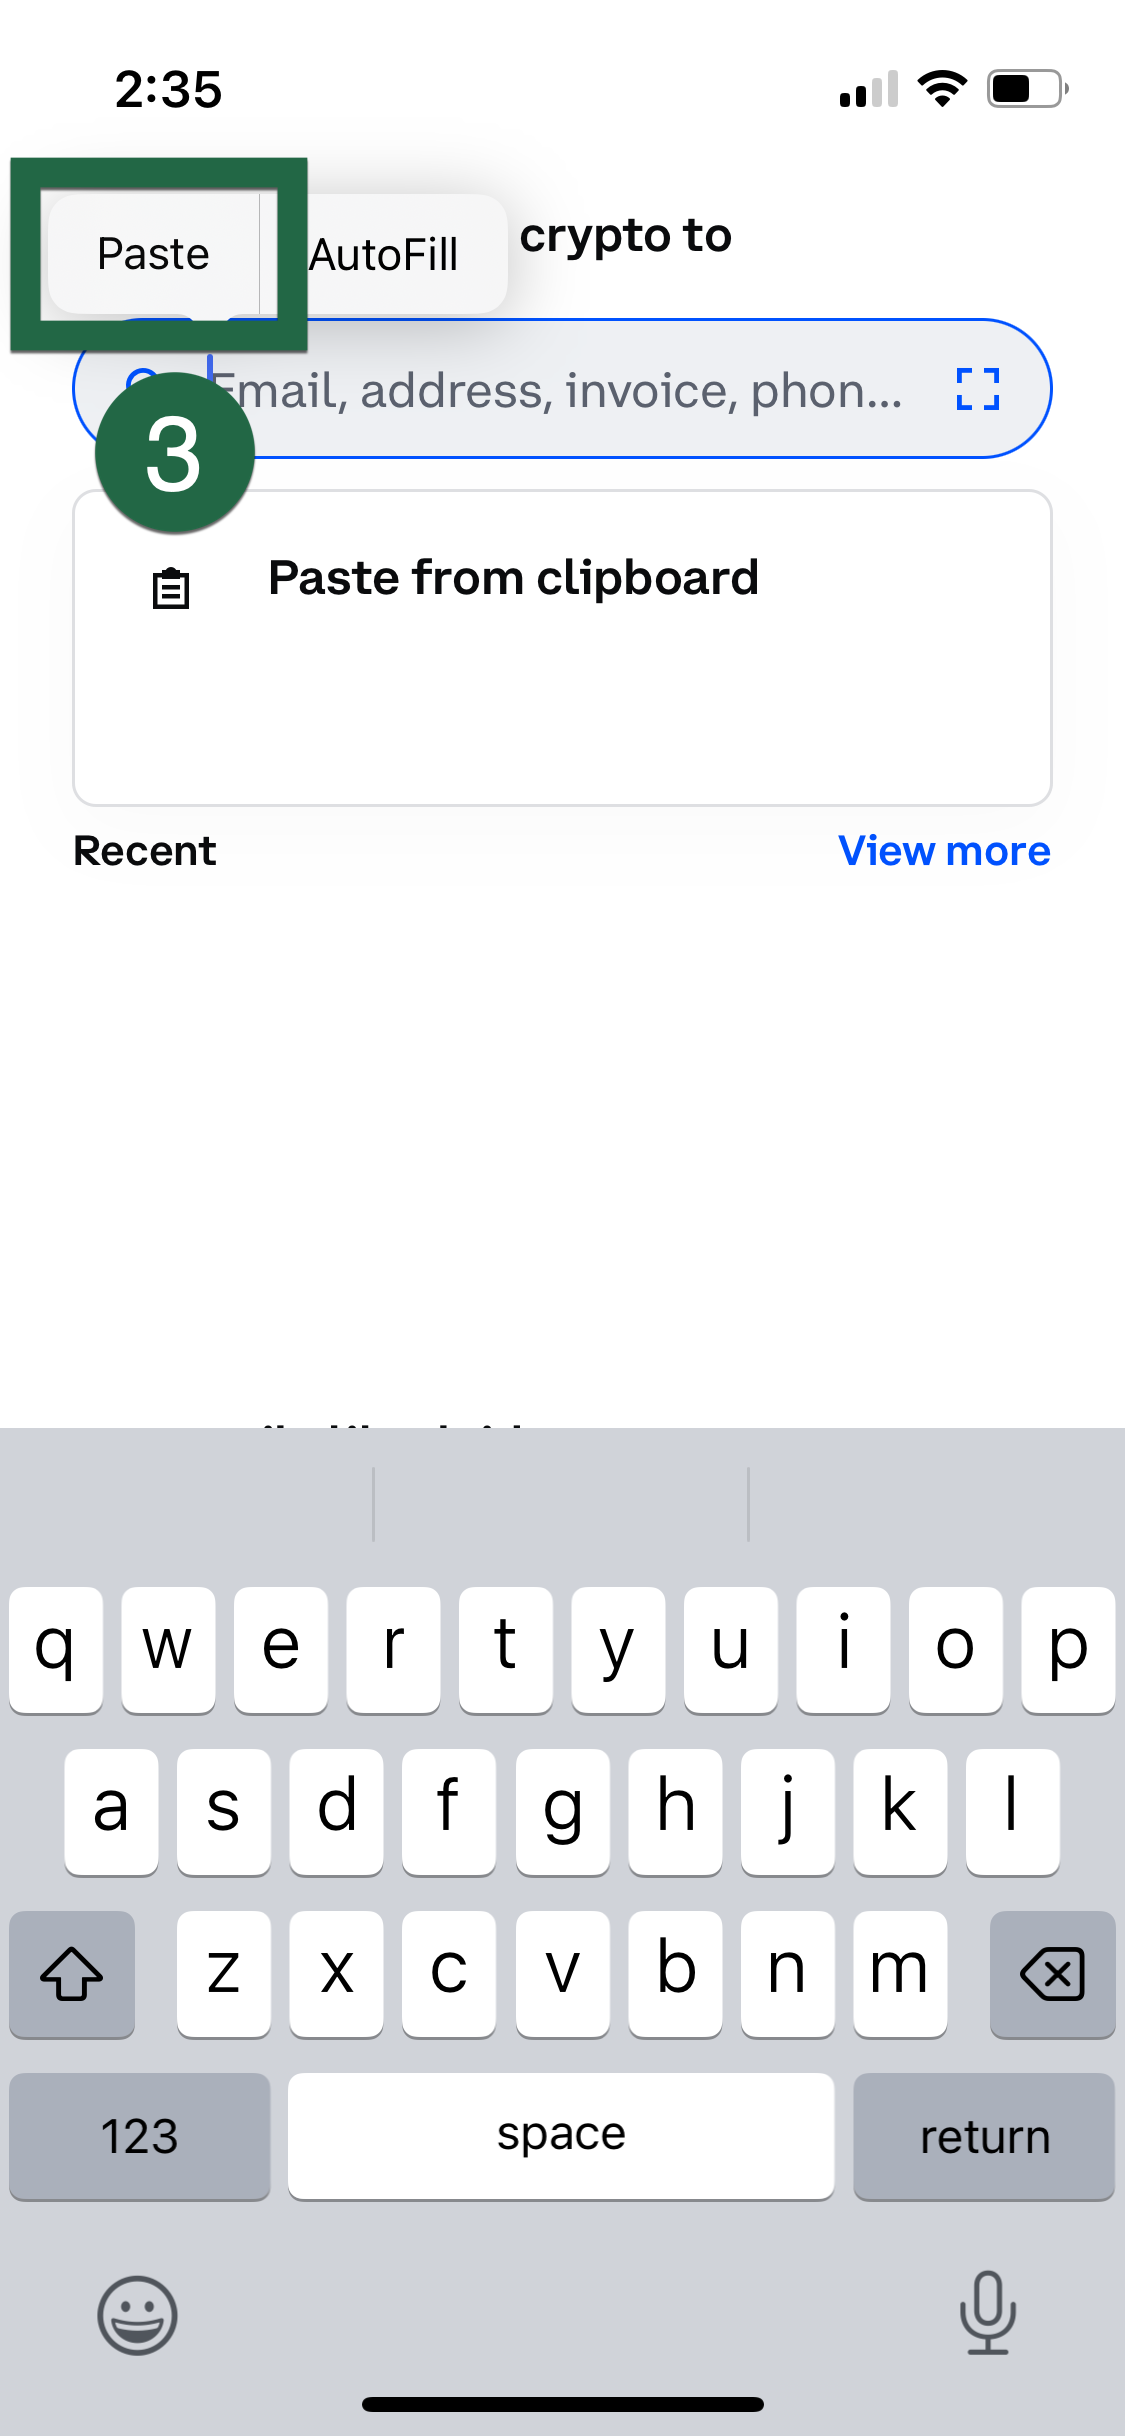
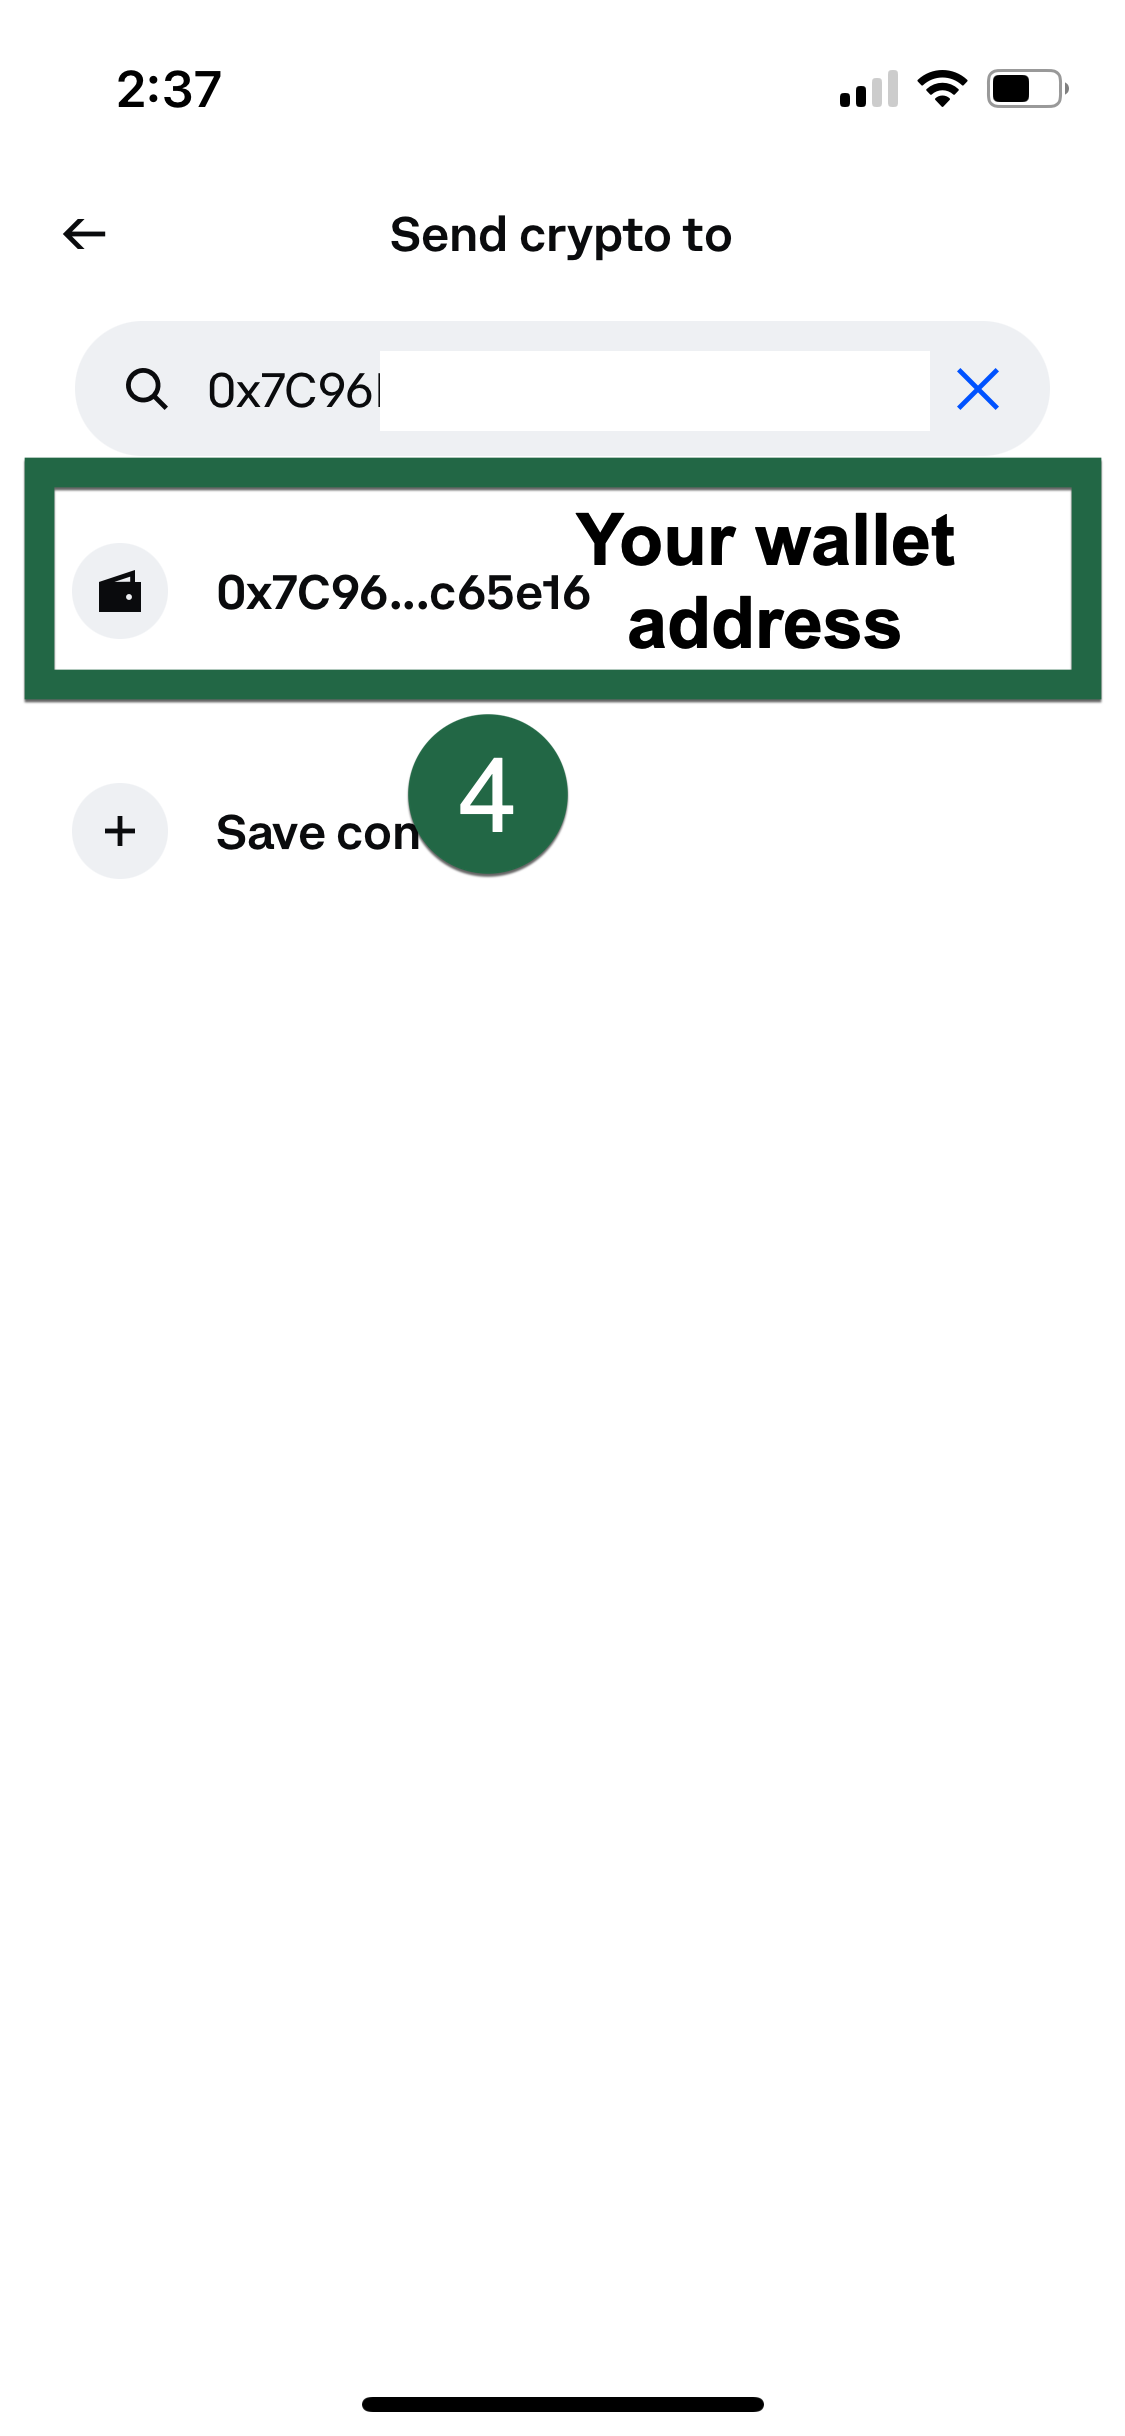
First, open your wallet app and copy your username or ethereum address.
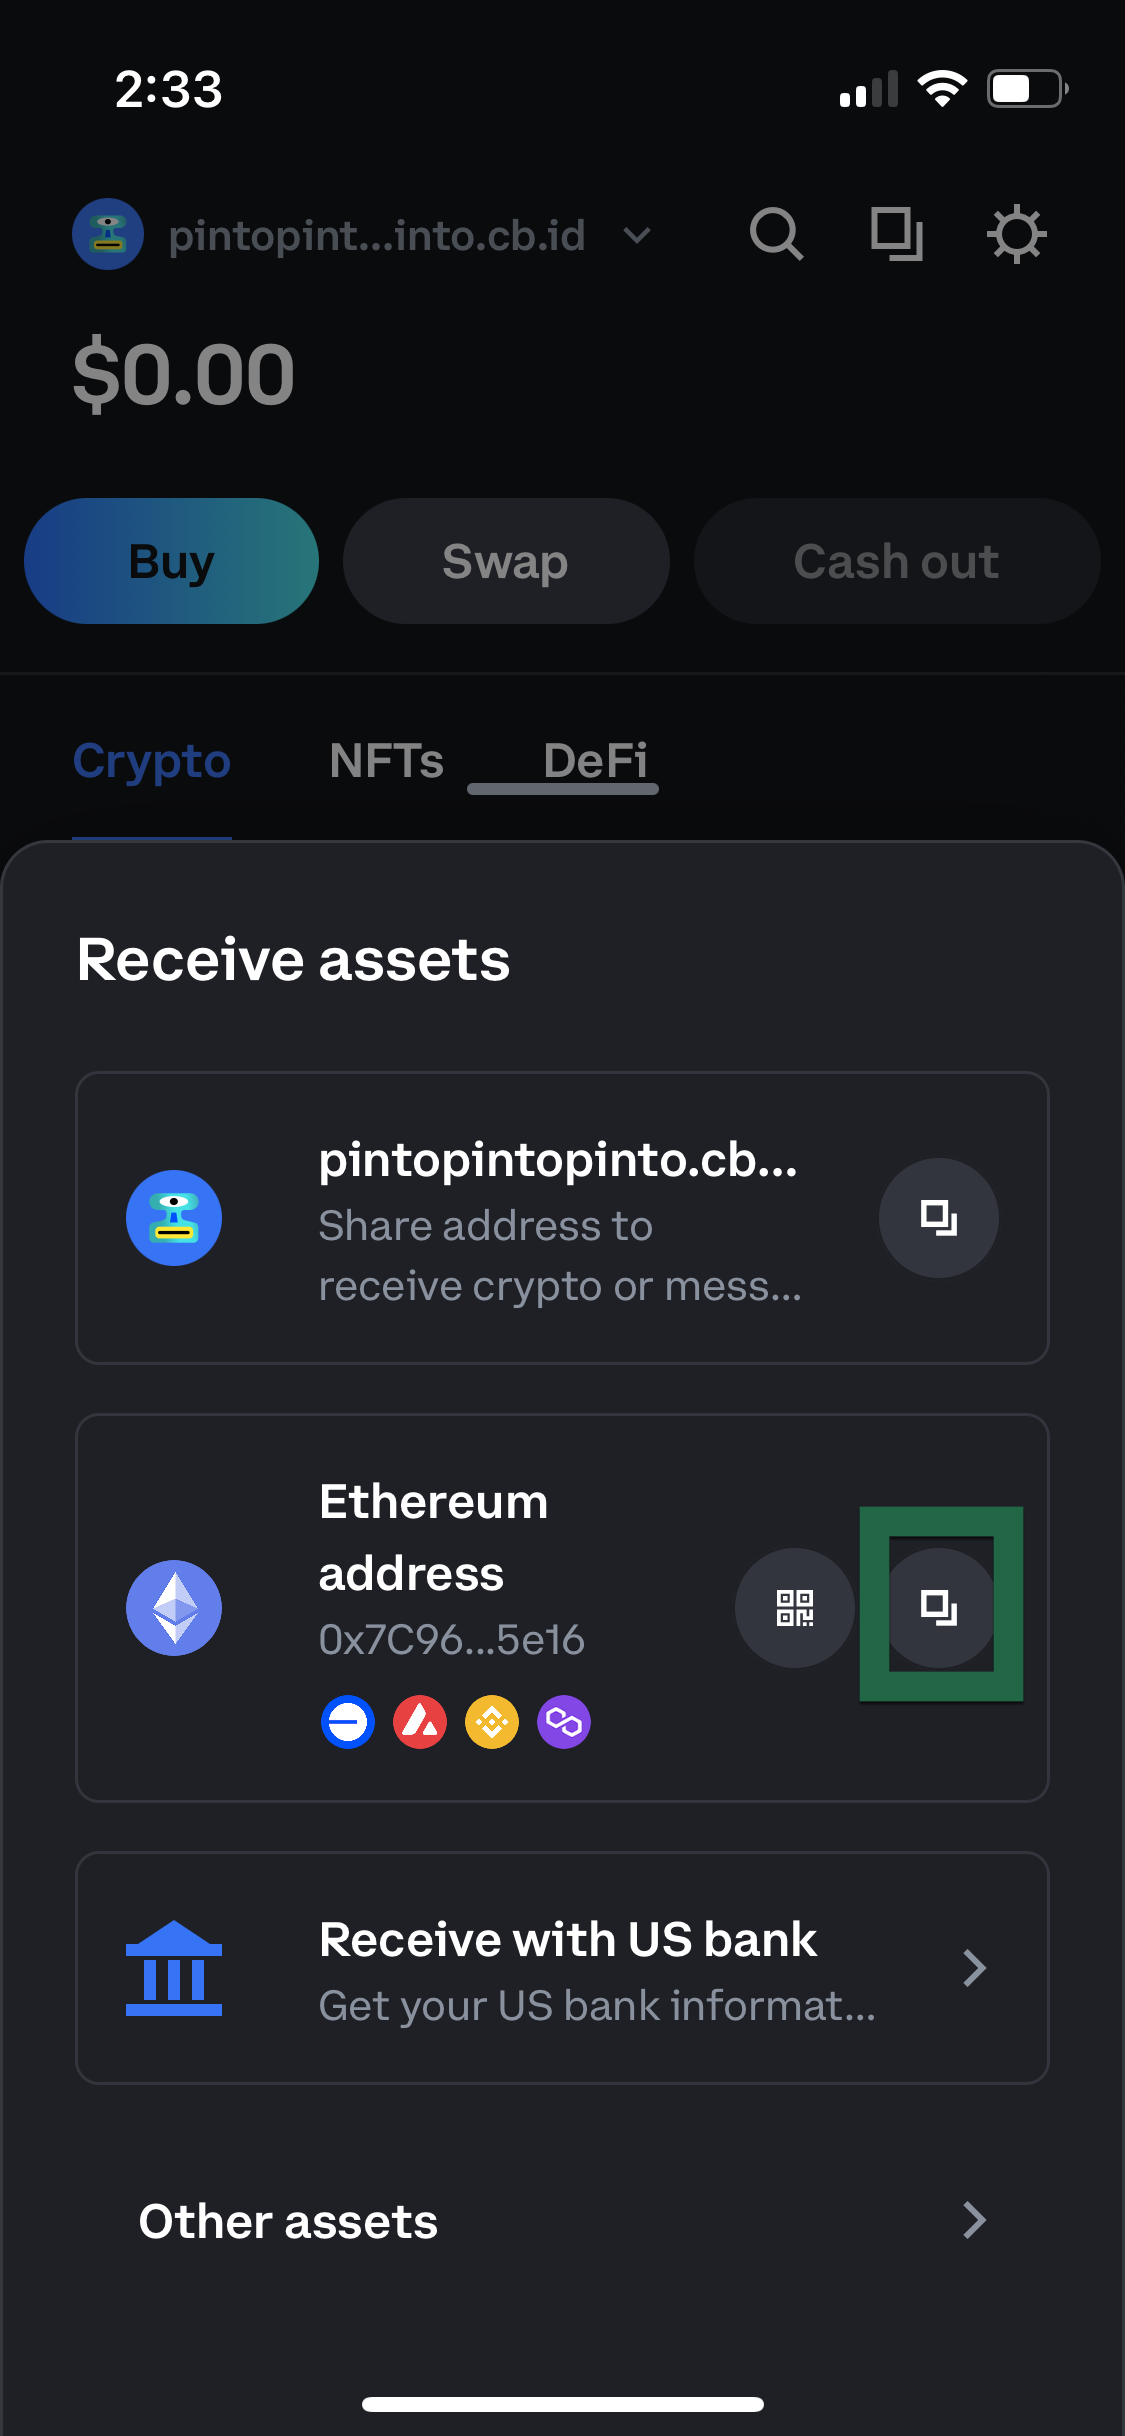
Then go back to your Coinbase app and search for USDC again. At the bottom of the screen you’ll tap Transfer then Send. Then, tap into the search bar and hit paste. Here, you will notice that the ethereum address is pasted, even if you copied the username out of your wallet. Don’t worry, the ethereum address will also transfer to the wallet. Click on the result.

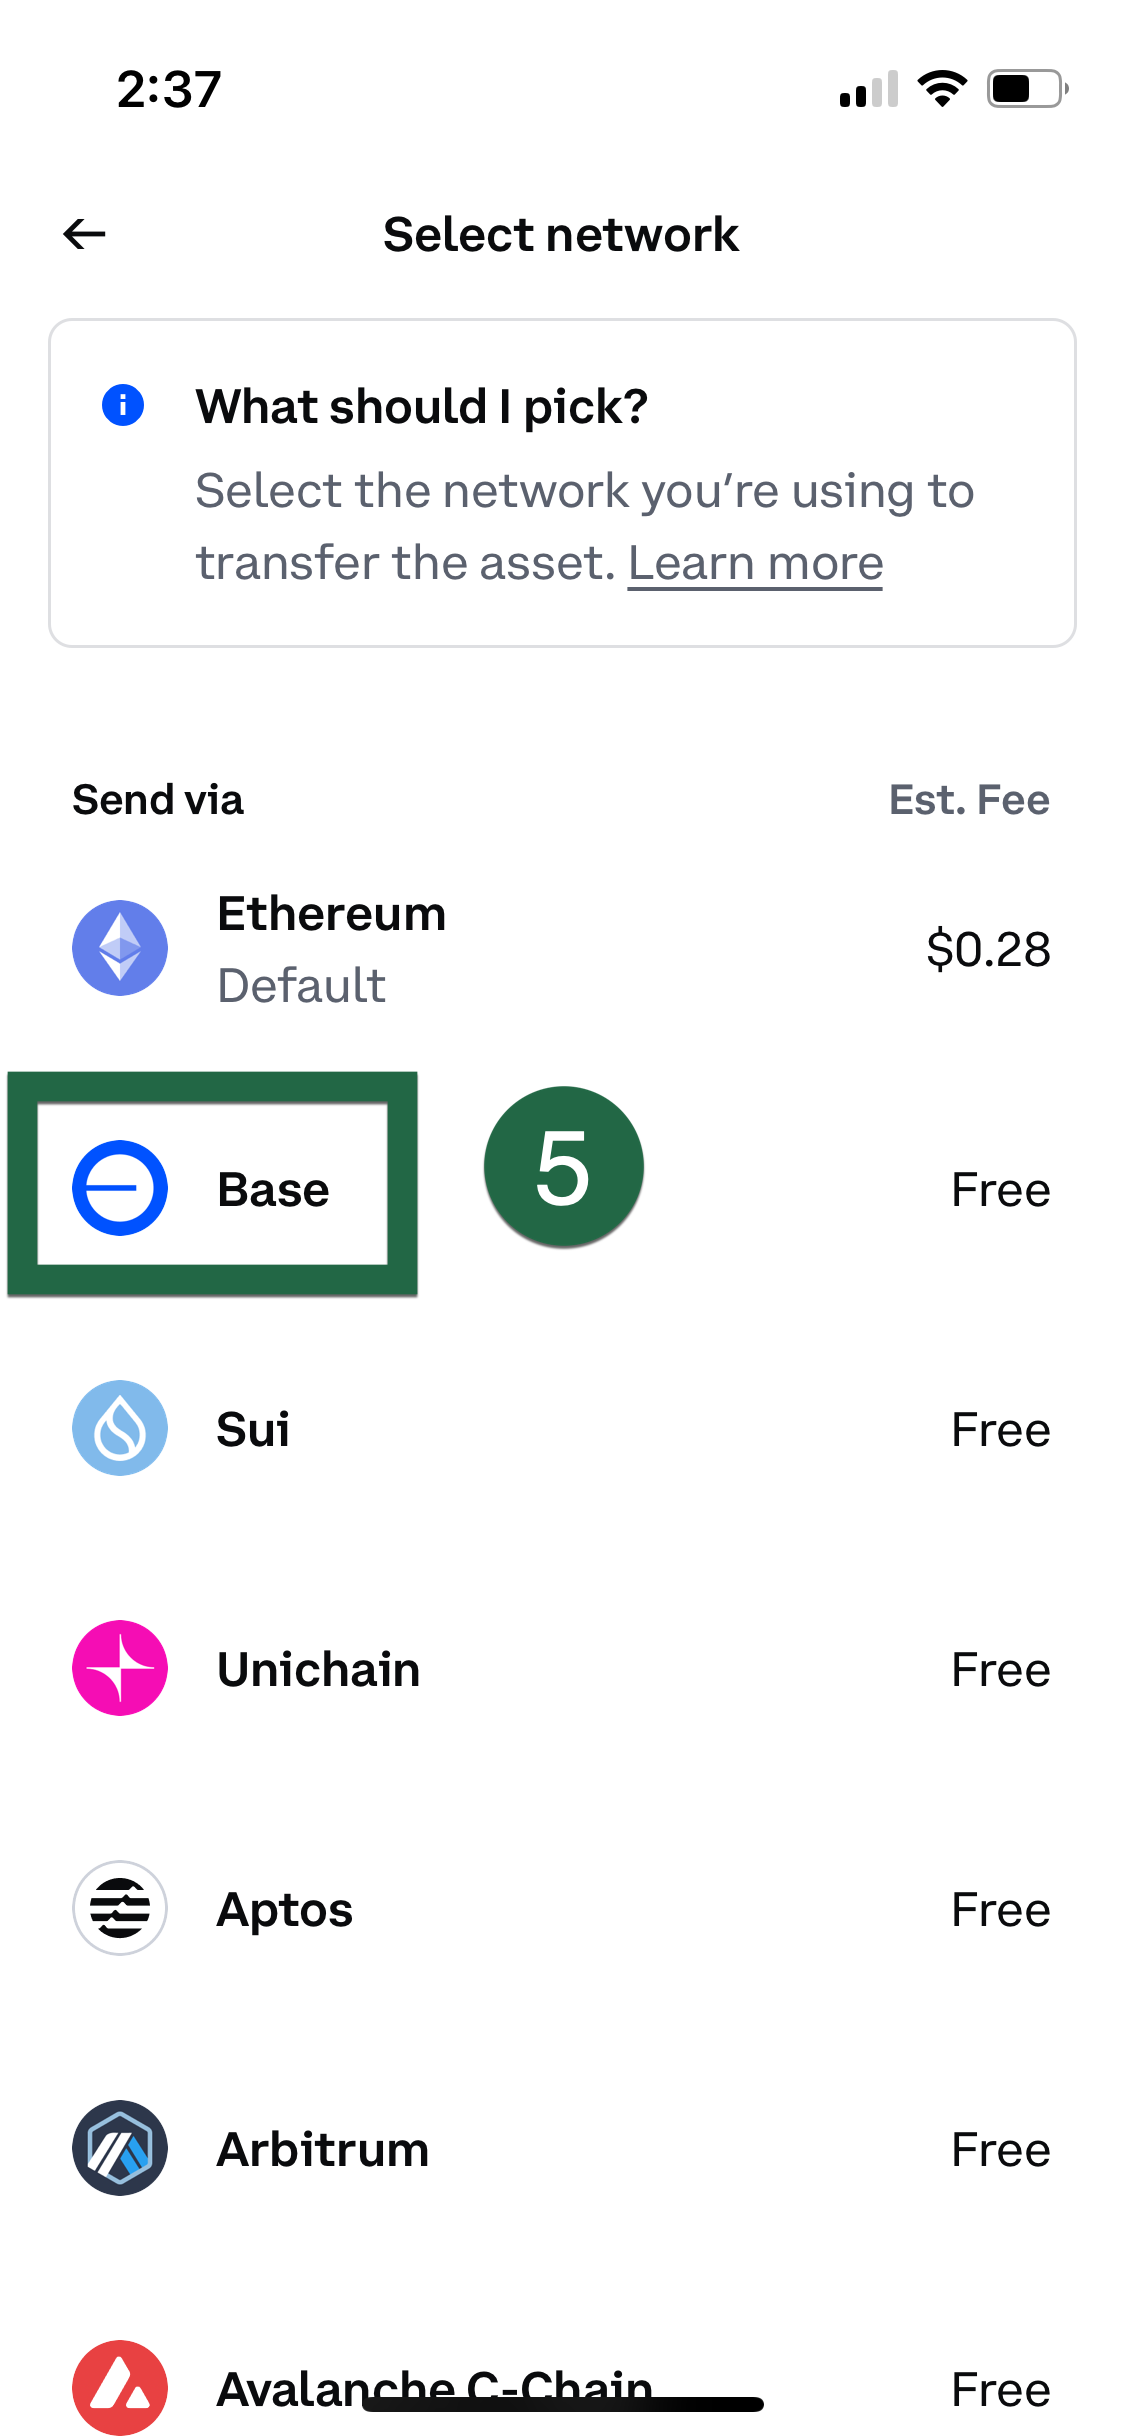
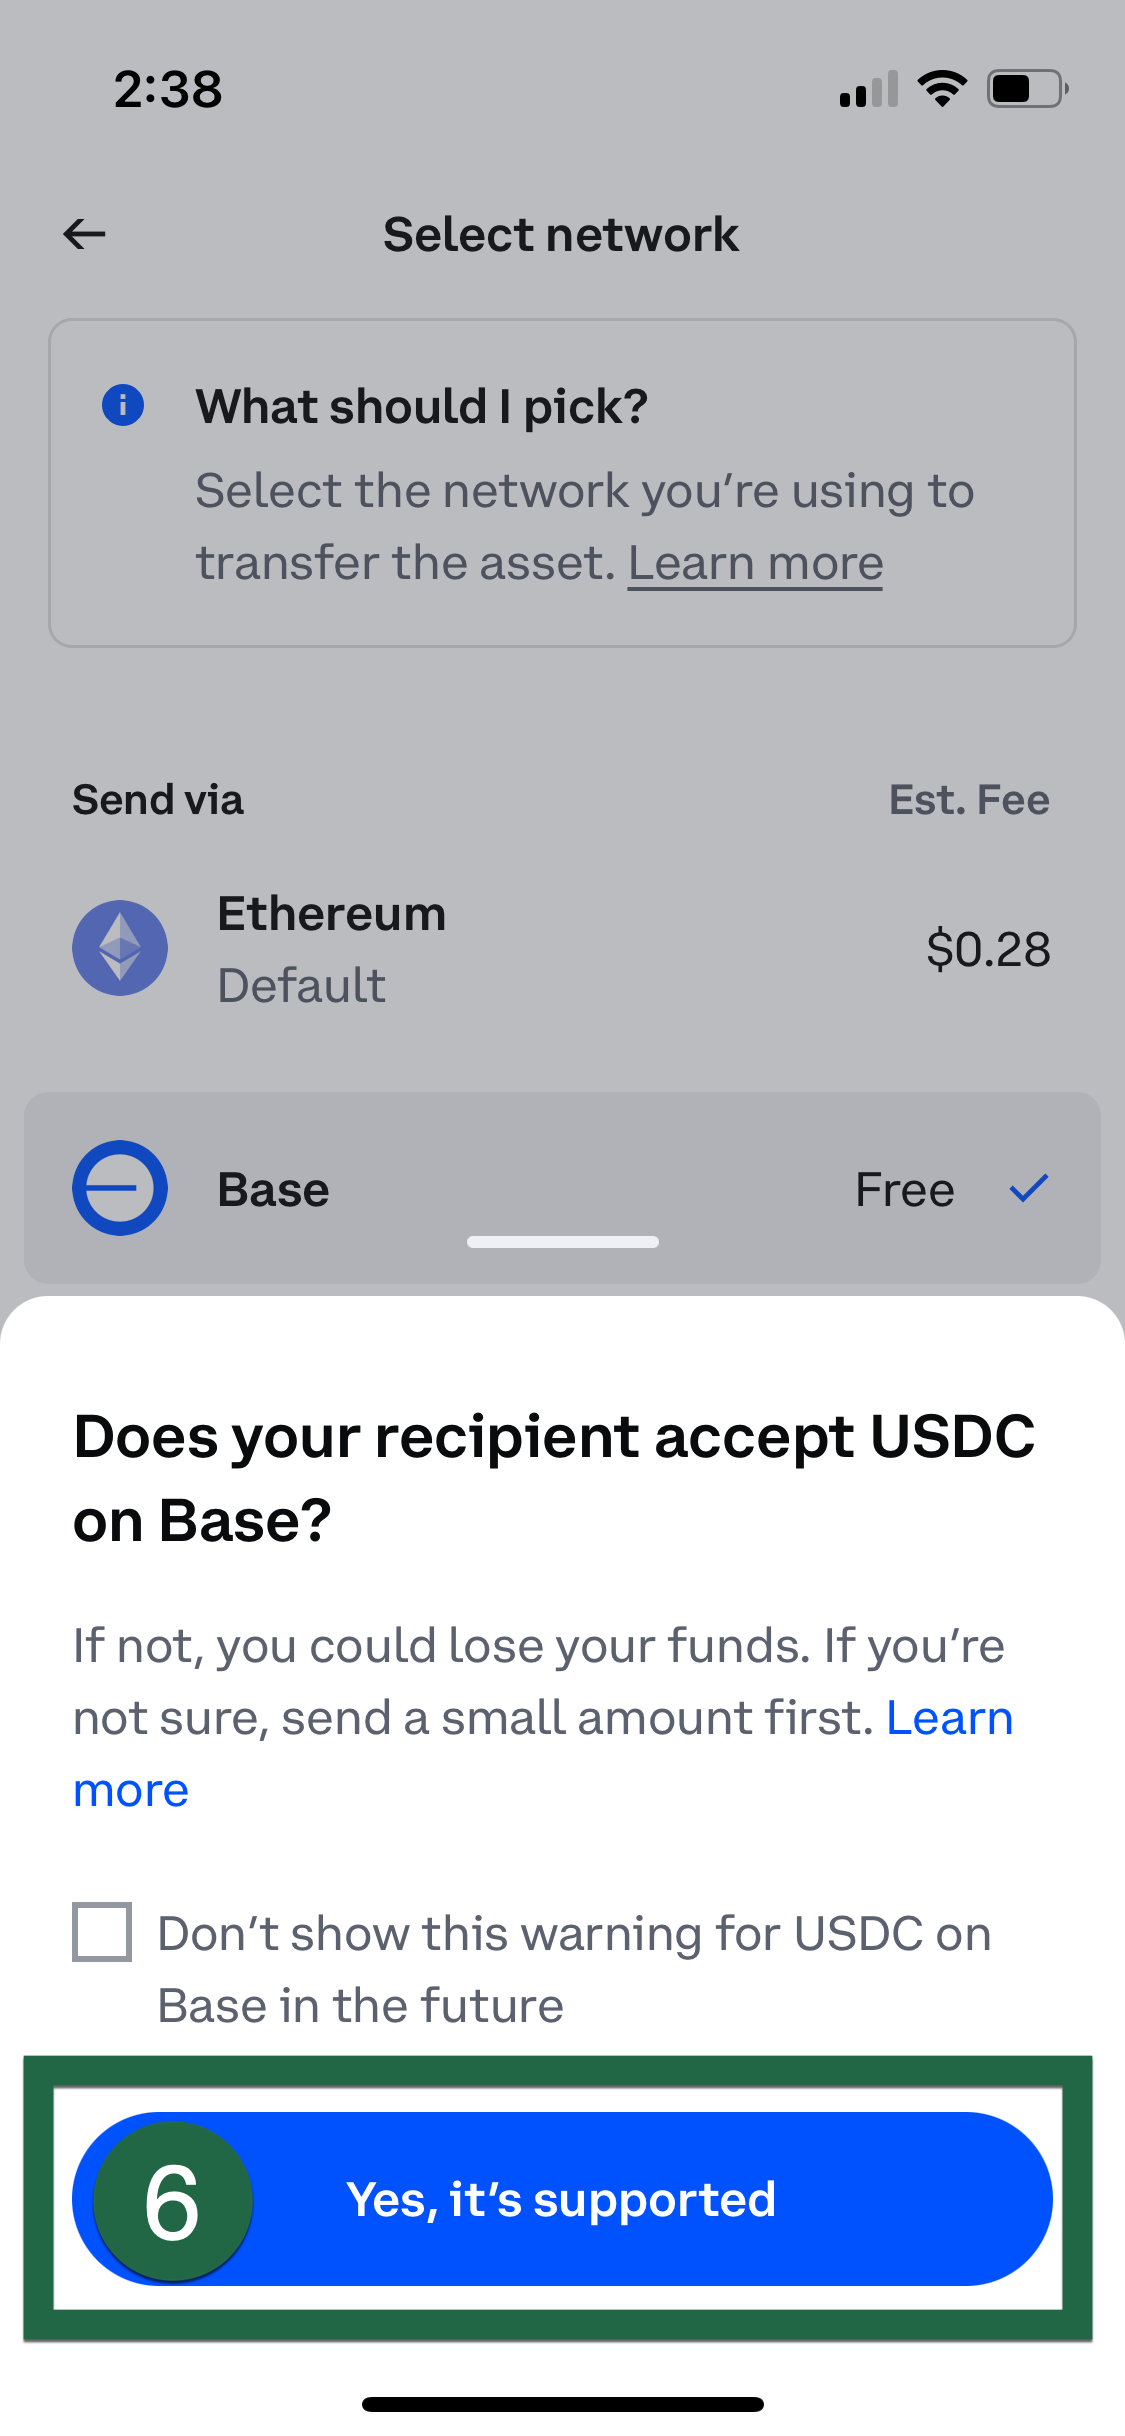
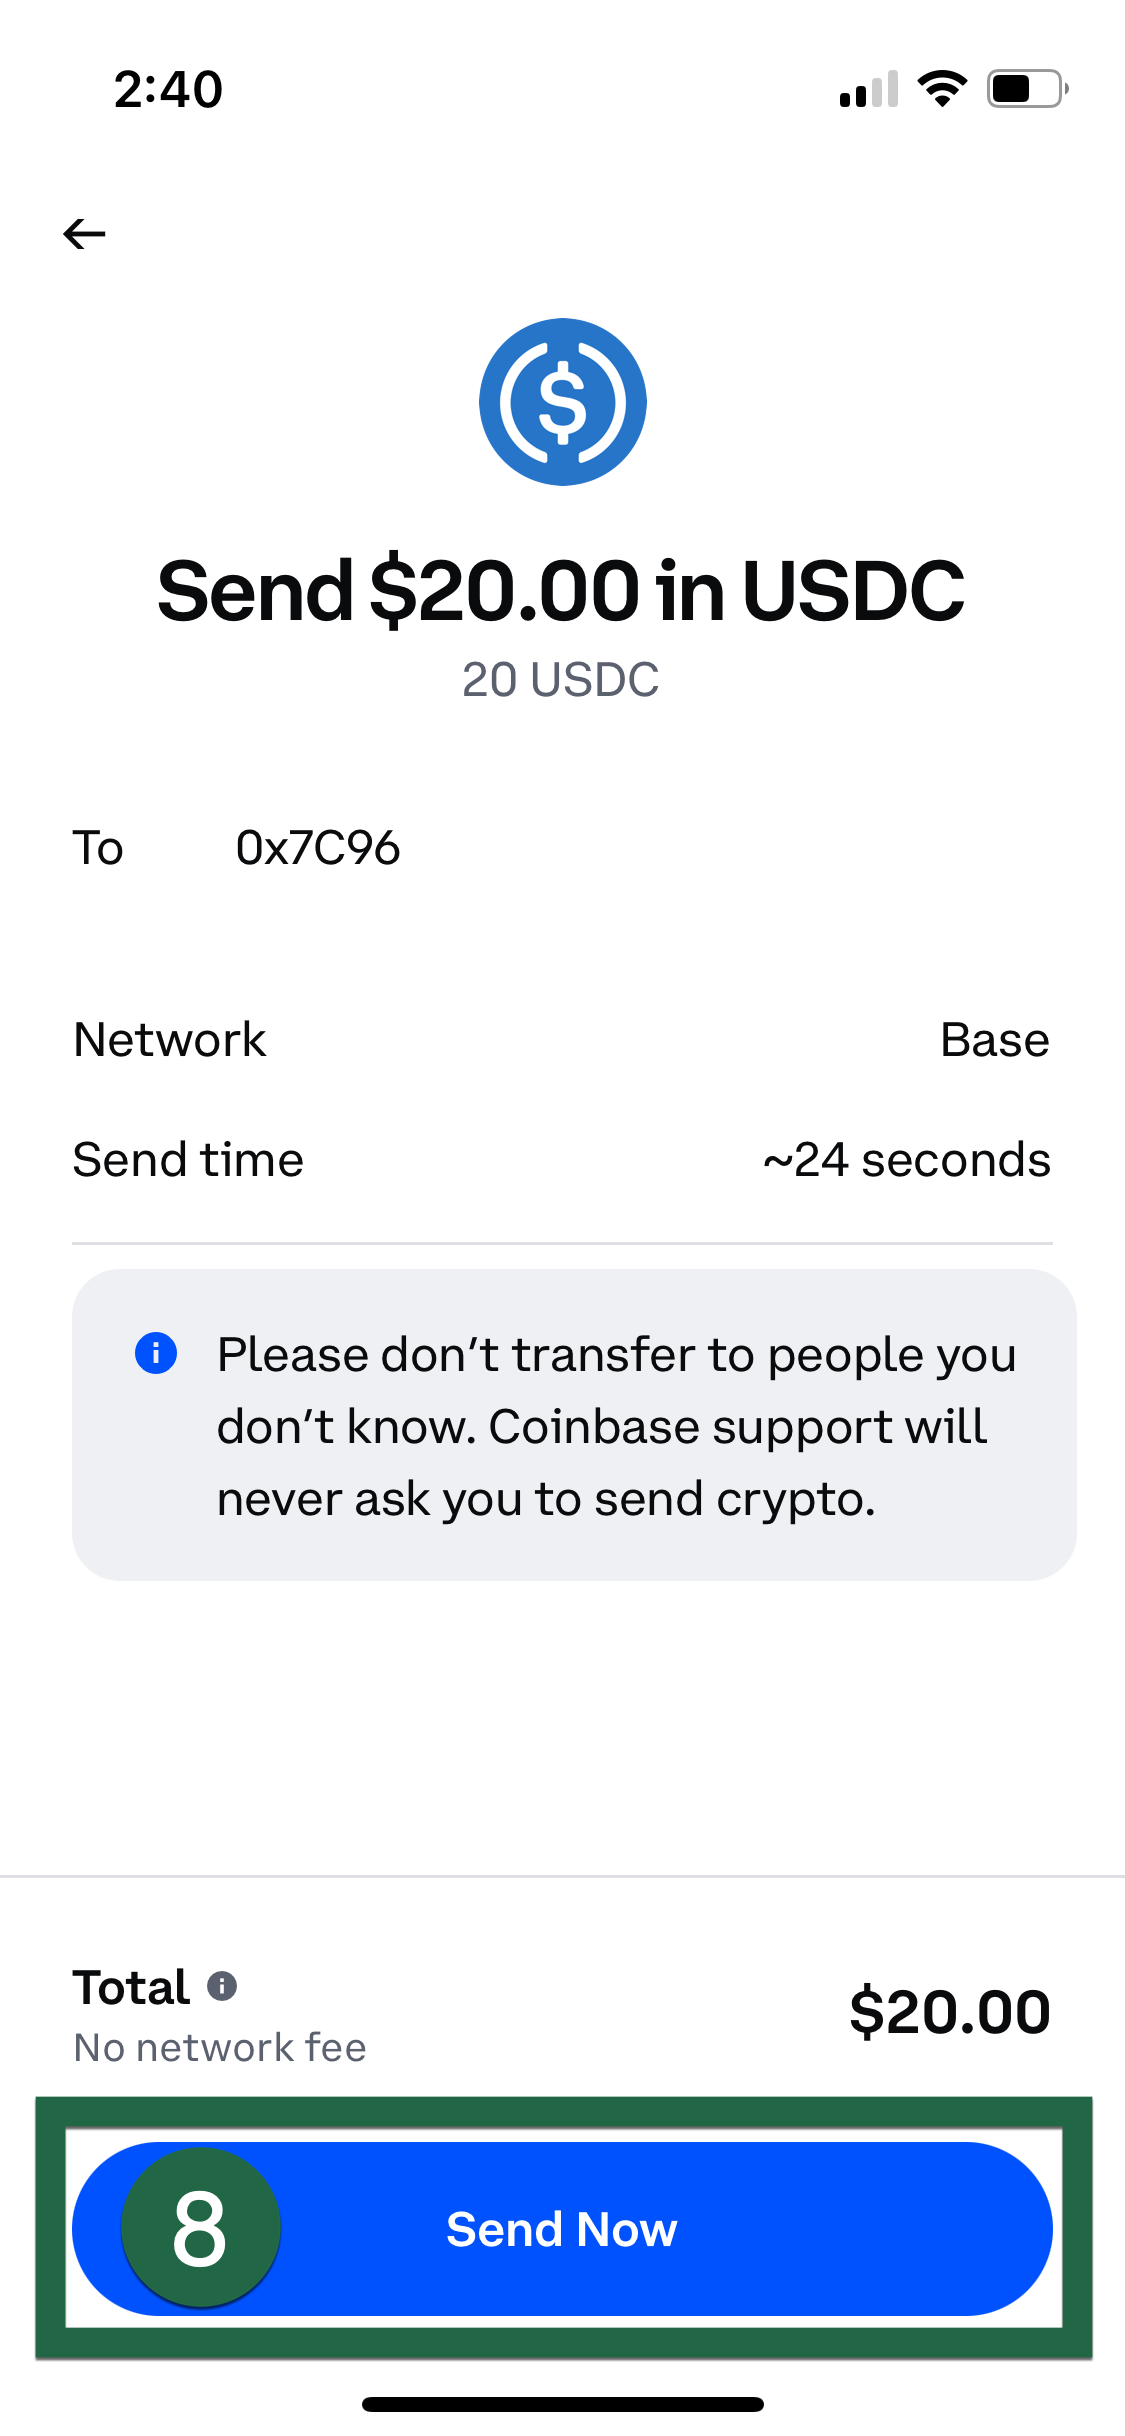
Next, you’ll have to select the network to transfer. Select Base. This step is very important to ensure you have the USDC available to buy pinto later. The base network is supported in your wallet, so click Yes, it’s supported on the next screen.
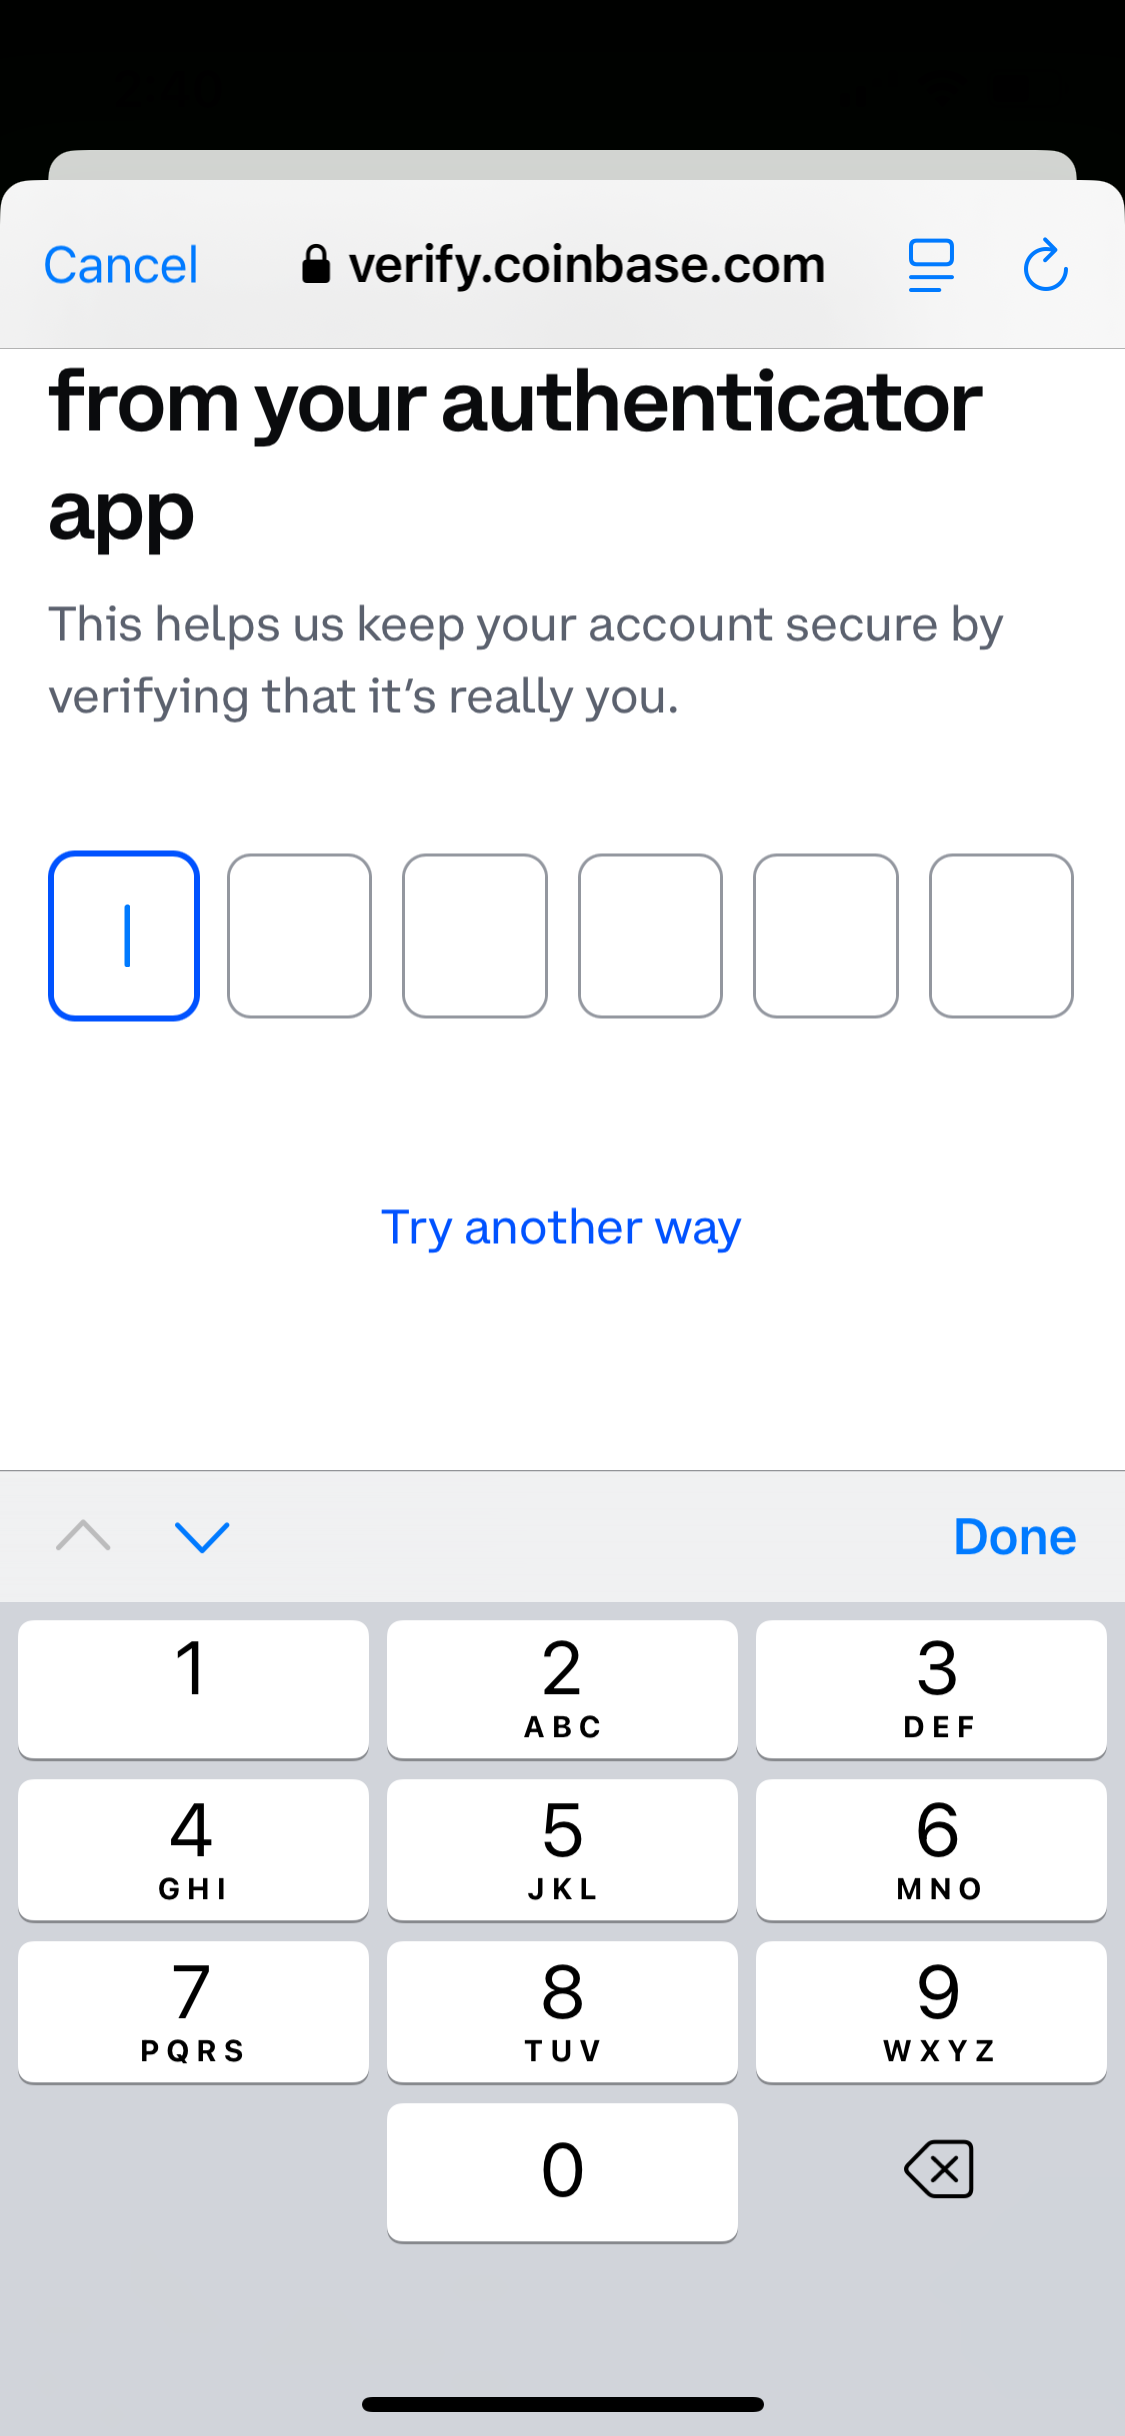
Enter the amount of USDC you want to transfer and hit preview, then Send Now on the next screen. Then follow the prompts to complete 2FA verification.
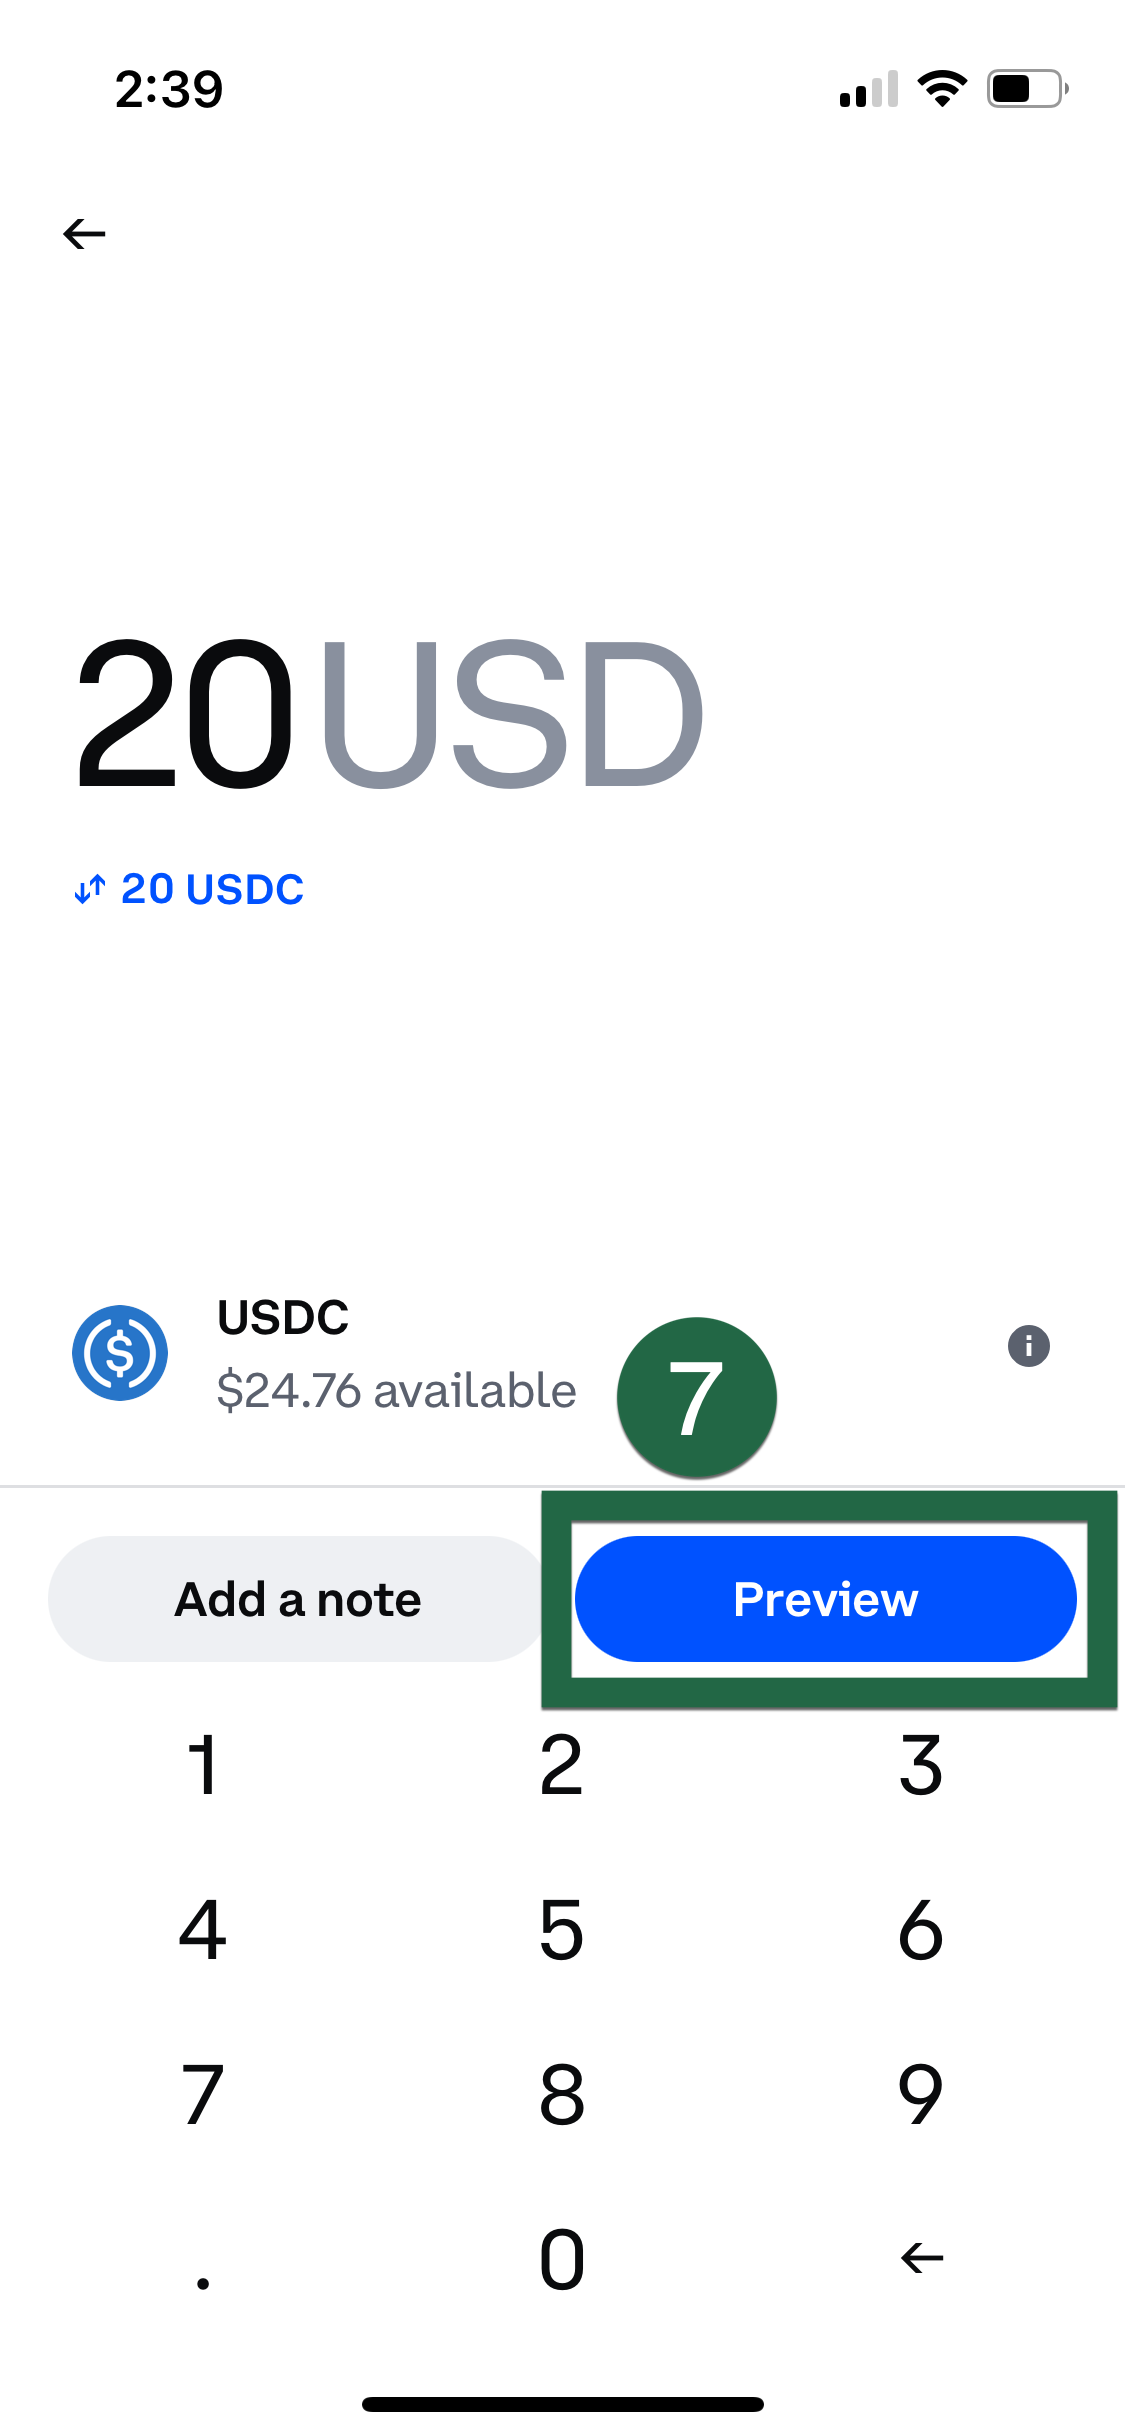
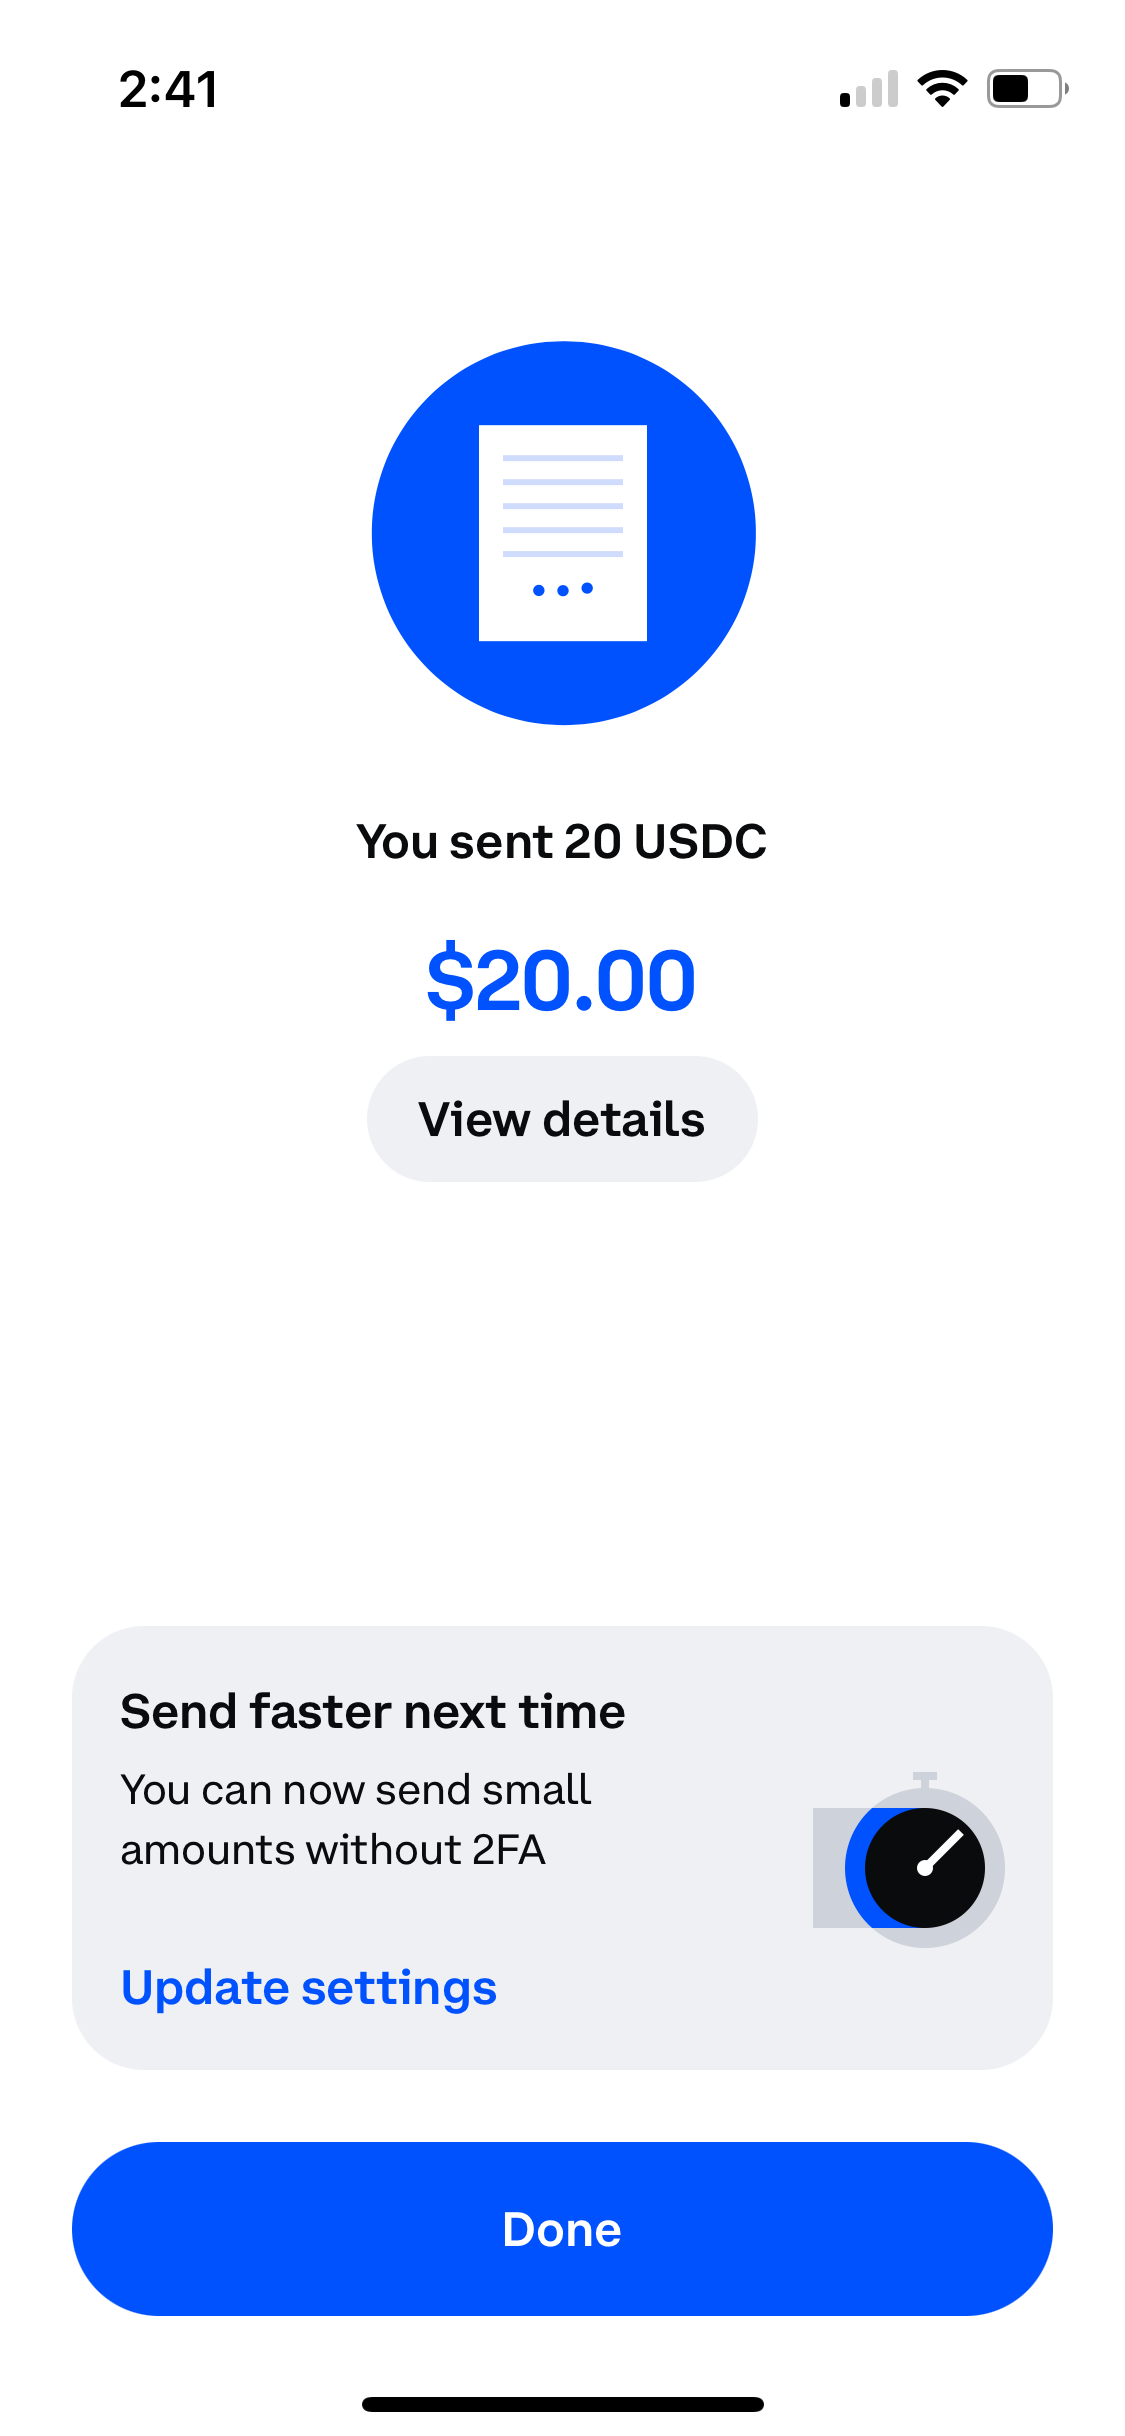
Once this is done, you will see a confirmation screen.
If you are familiar with crypto and already have USDC somewhere else, like an exchange, you can also transfer it from your crypto exchange account to your wallet. Make sure to transfer on the base network.
Add $10 worth of ETH to your wallet
You’ll want to follow the same process to buy USDC but this time buy ETH. This is to cover the gas, or network, fees later on. You can think of these gas fees as a small payment to the blockchain network for validating, confirming, and recording the purchase of pinto in the next steps. Usually gas fees are anywhere from 5 cents to 50 cents. Having $10 worth of ETH will ensure that the blockchain knows you have enough ETH to cover the fees. This $10 worth of ETH will cover many transaction fees so if you plan to make multiple purchases of pinto, you only need to do this step when you run low. If your ETH balance is too low you won’t be able to buy pinto.
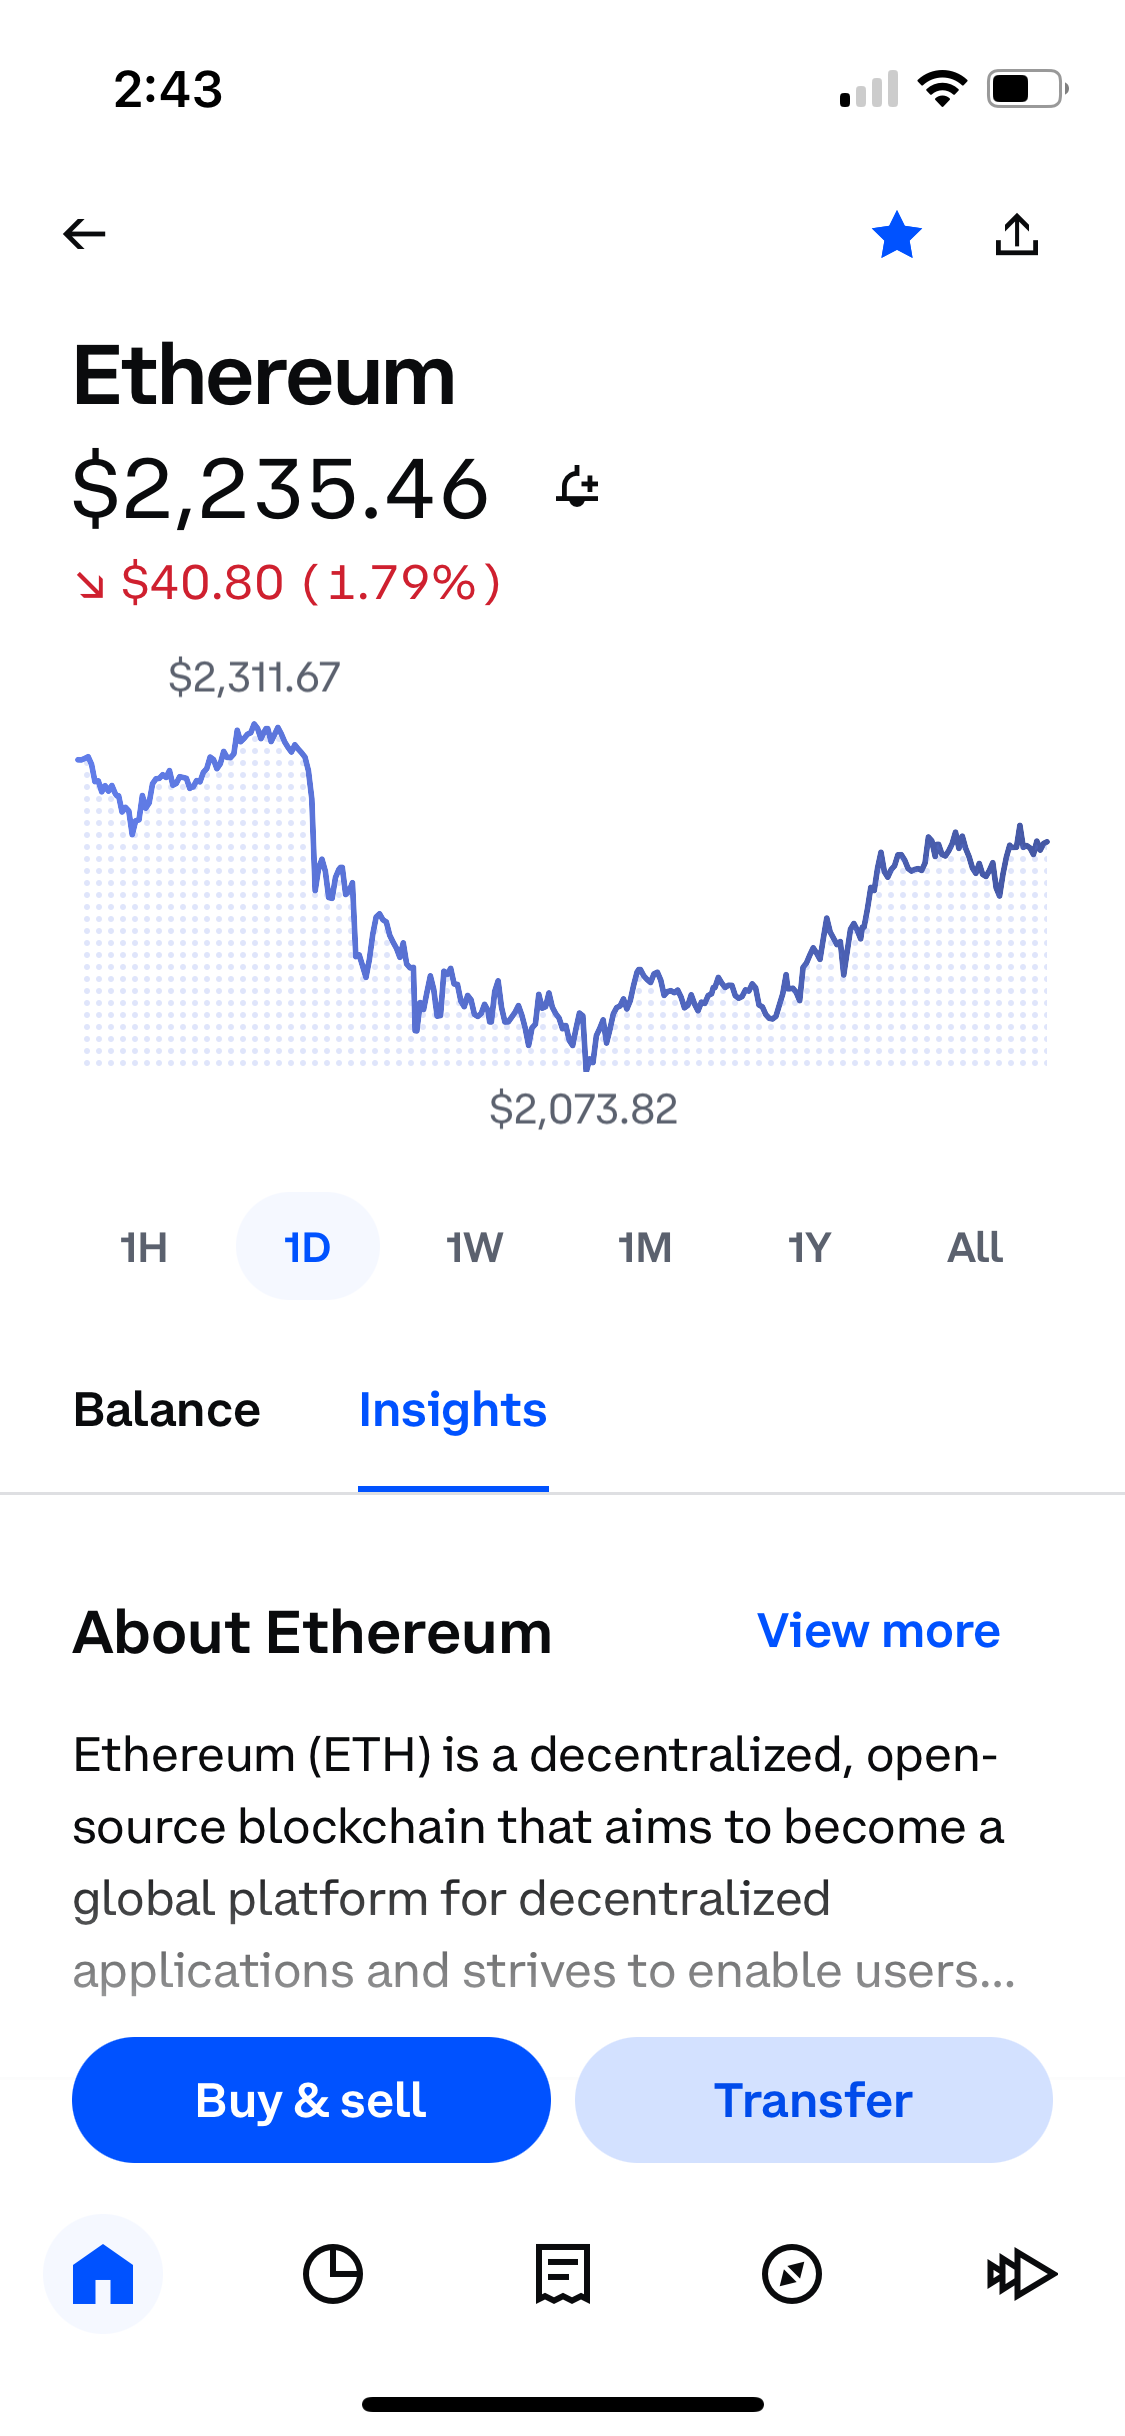
To do this, search for ETH, click Ethereum and then follow the same steps for purchasing and transferring the Ethereum to your wallet, using the Base network. Here’s what the Ethereum buy page looks like in the coinbase app.
Go to pinto.money and connect your wallet
With your wallet funded, you’re ready to get pinto! We find the pinto website easiest to navigate when using a computer, but you can also follow these steps on their mobile app.
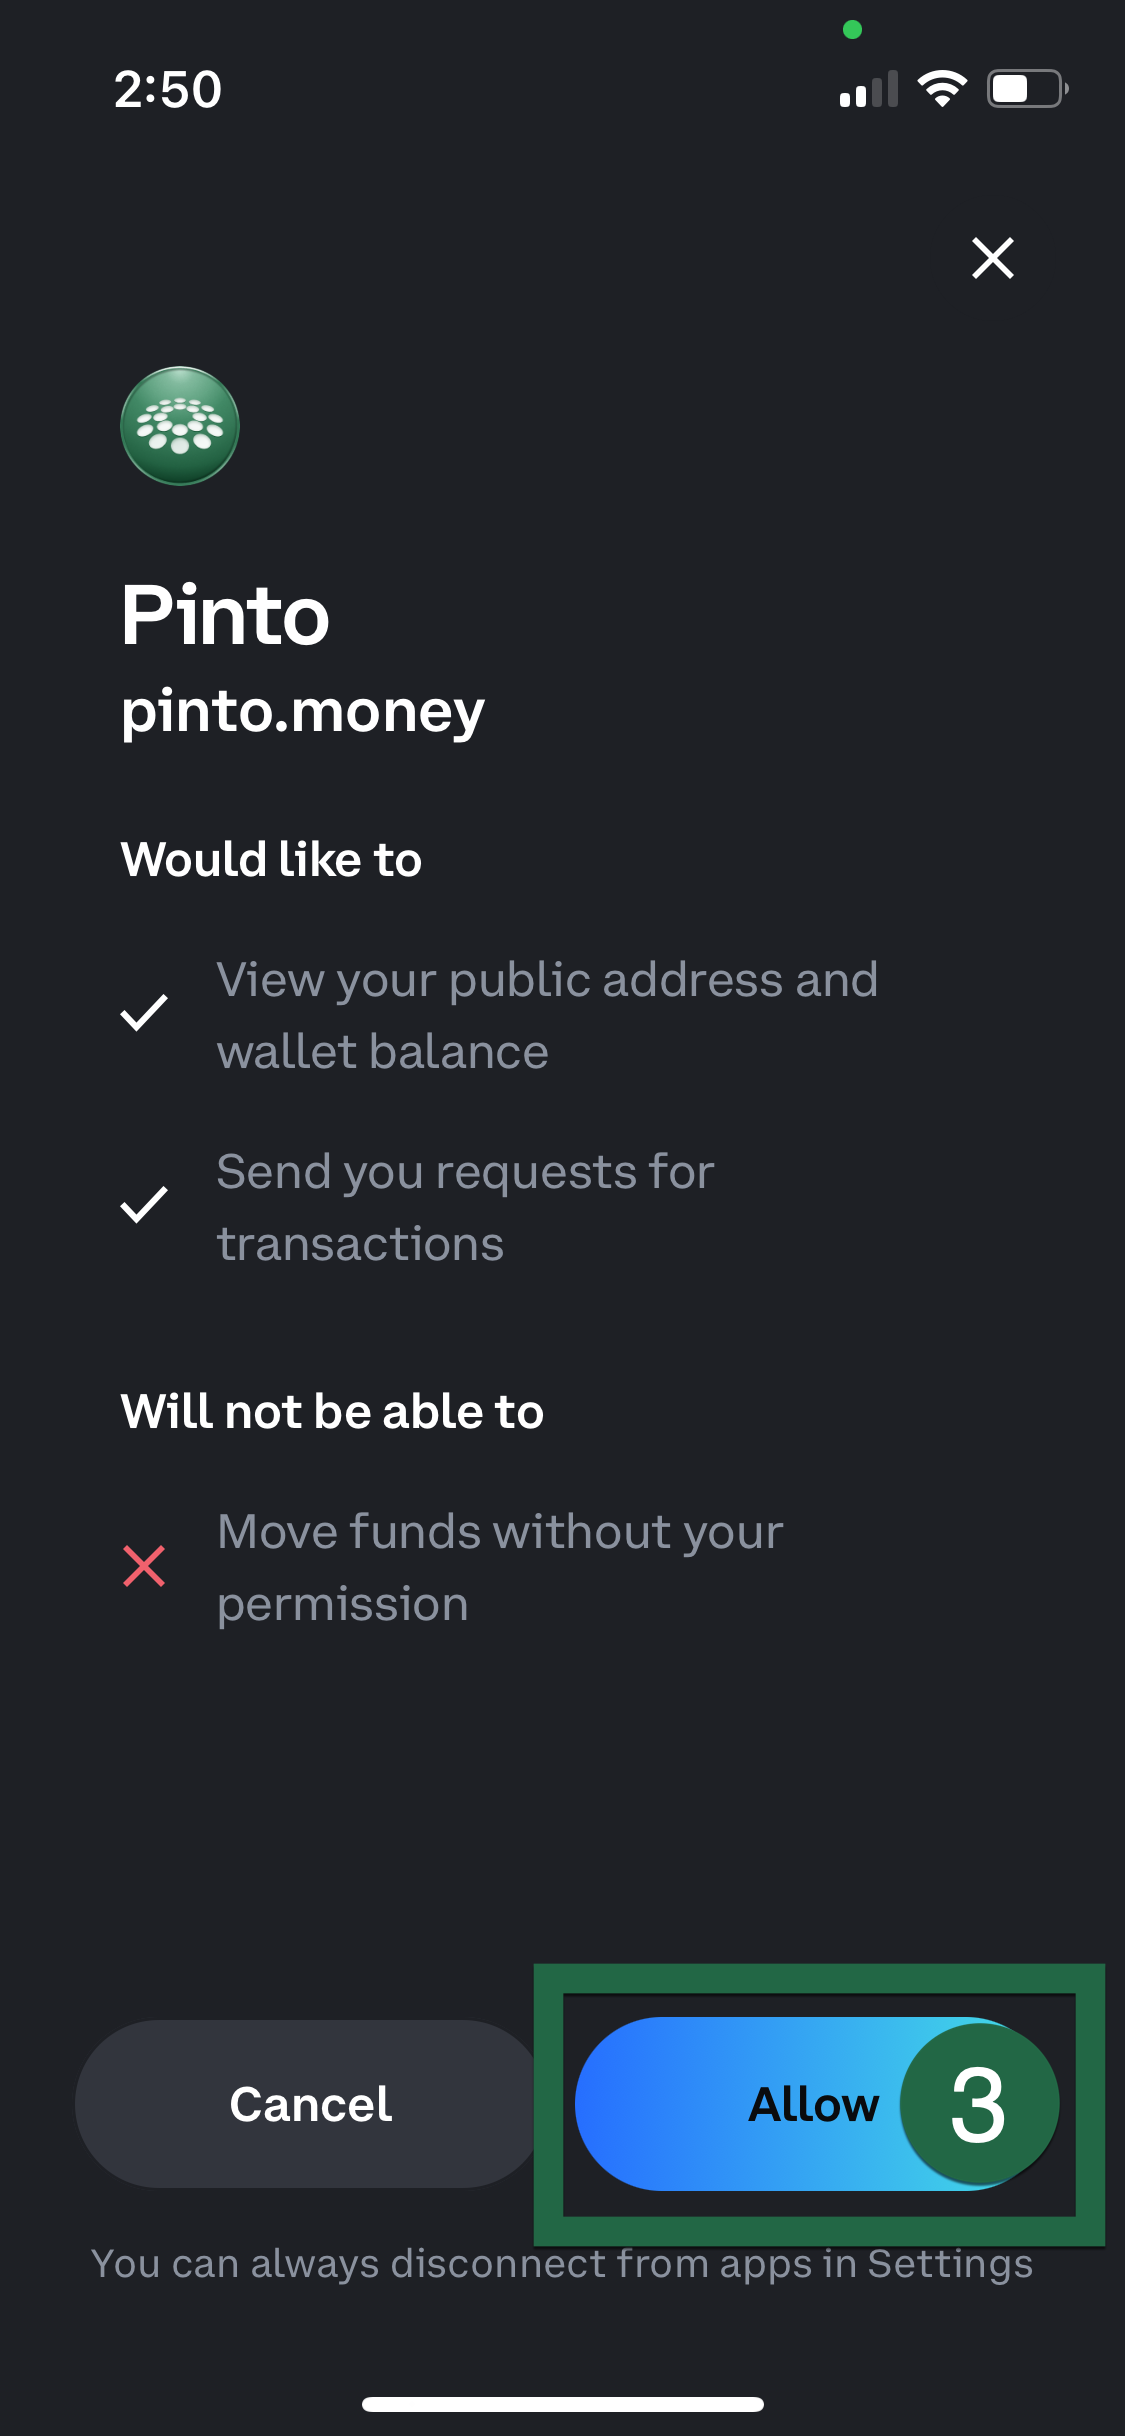
First, go to pinto.money and click connect. Follow the steps to connect a Coinbase Wallet using a QR code.


When the QR code comes up on the pinto.money site, open your wallet app on your phone and from the home tab, tap the QR code reader in the top right. Once you scan the QR code, you’ll tap Allow.
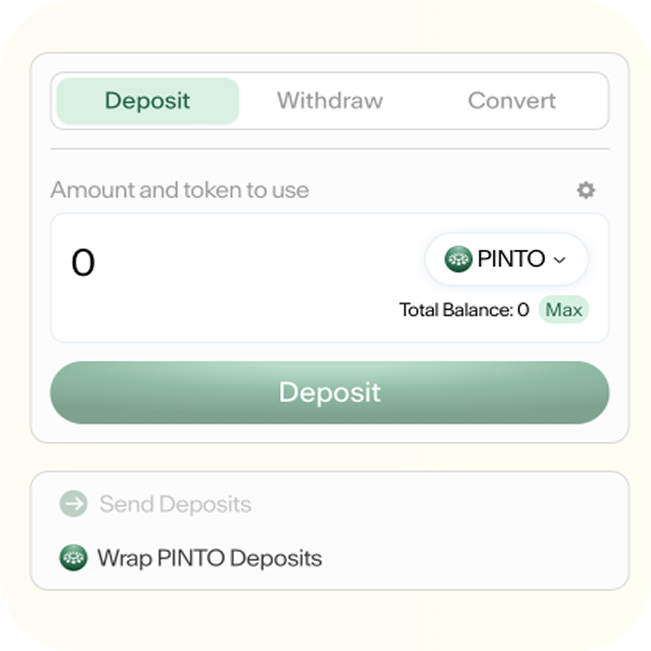
Navigate to the PINTO deposit facility
Follow this link to get to the PINTO deposit facility.
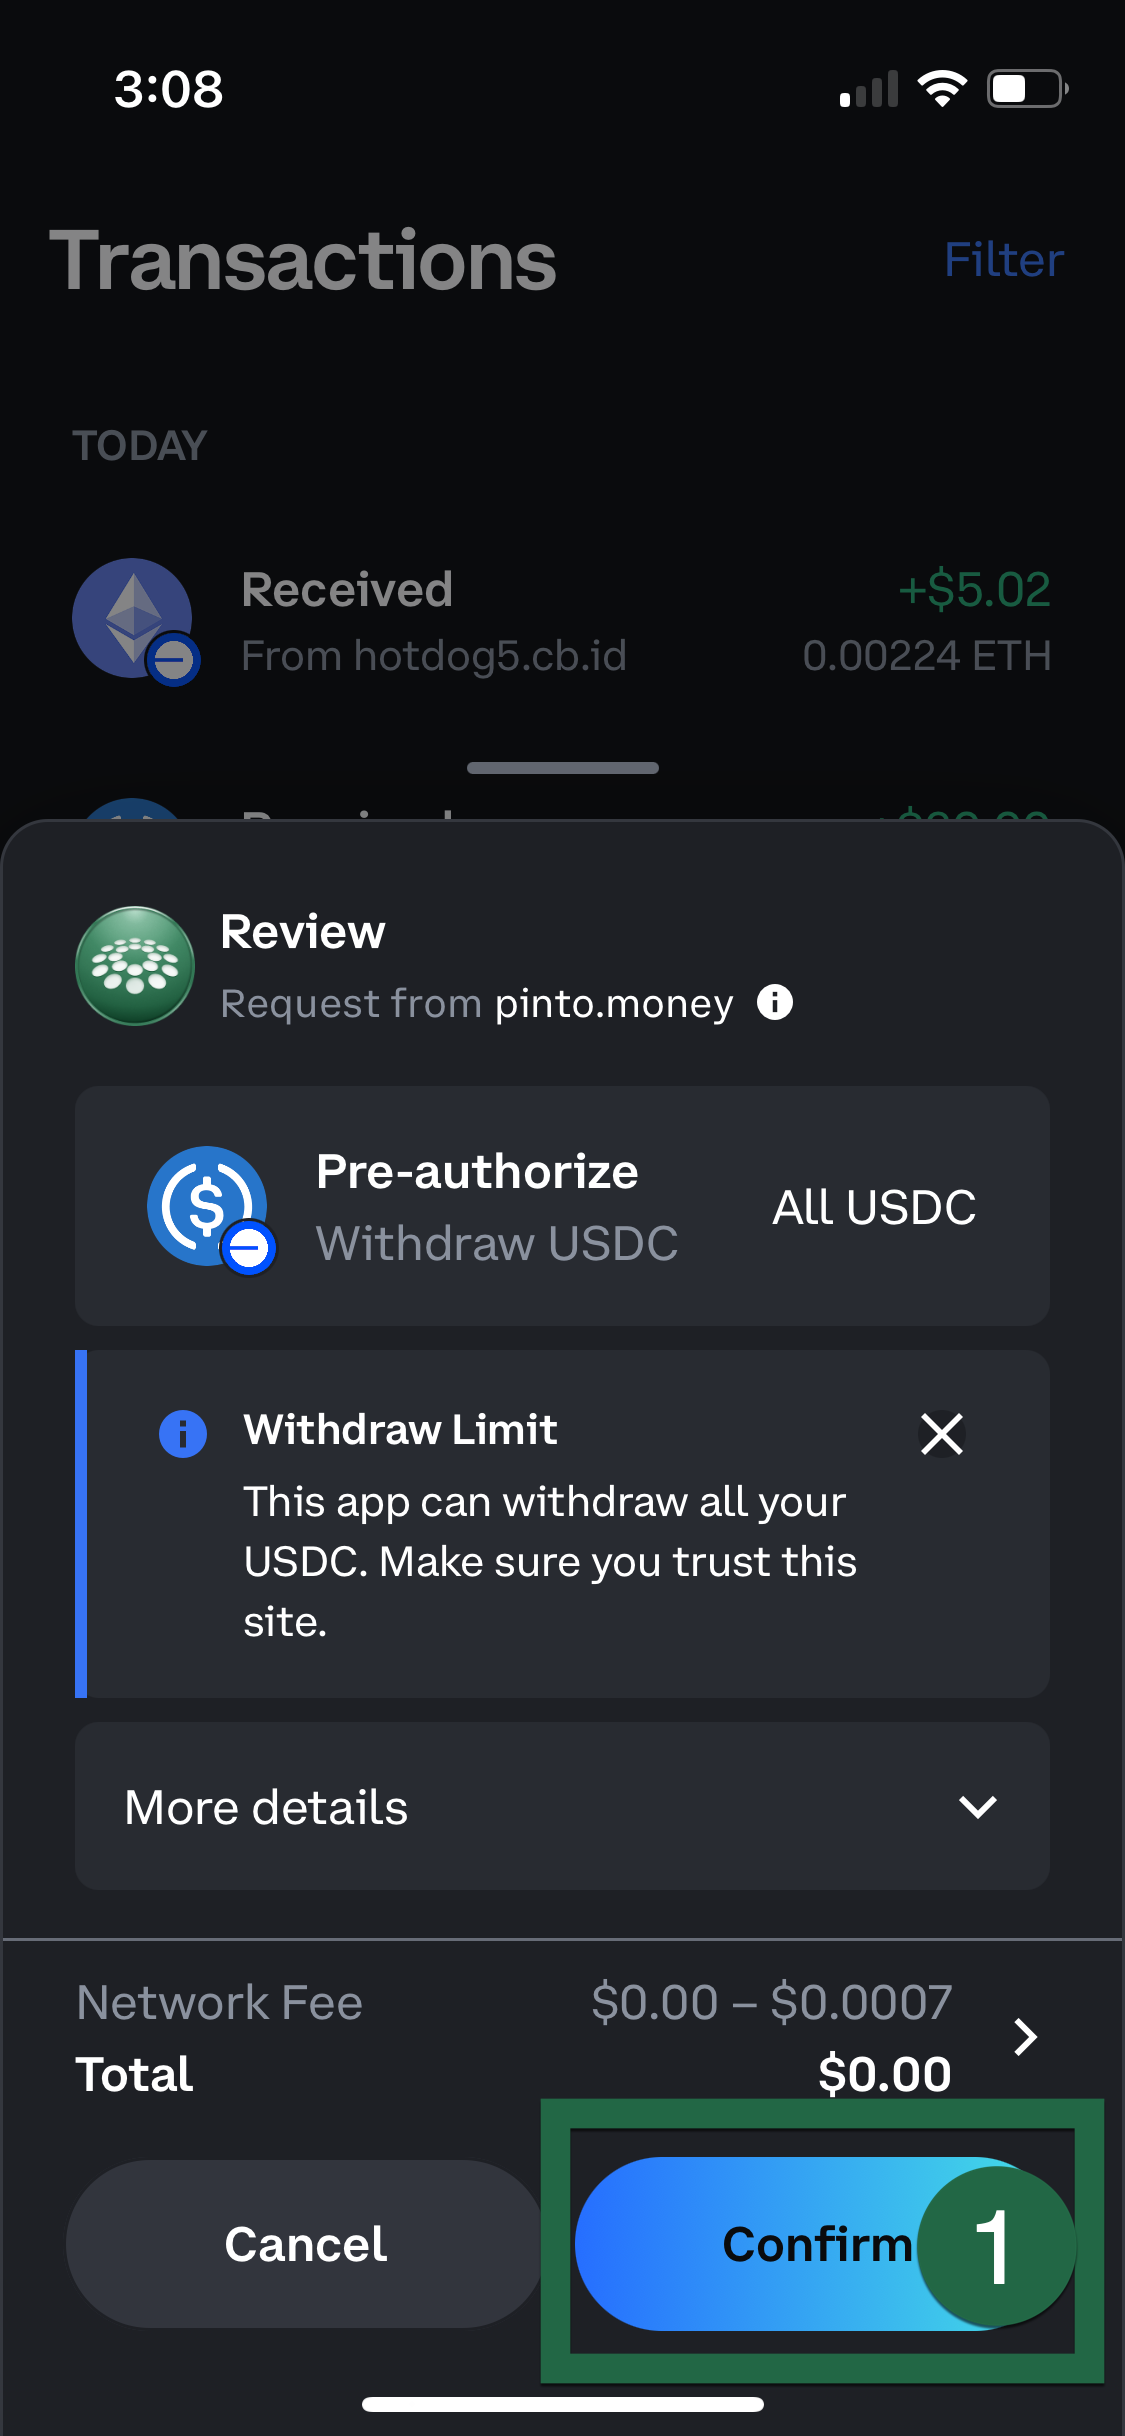
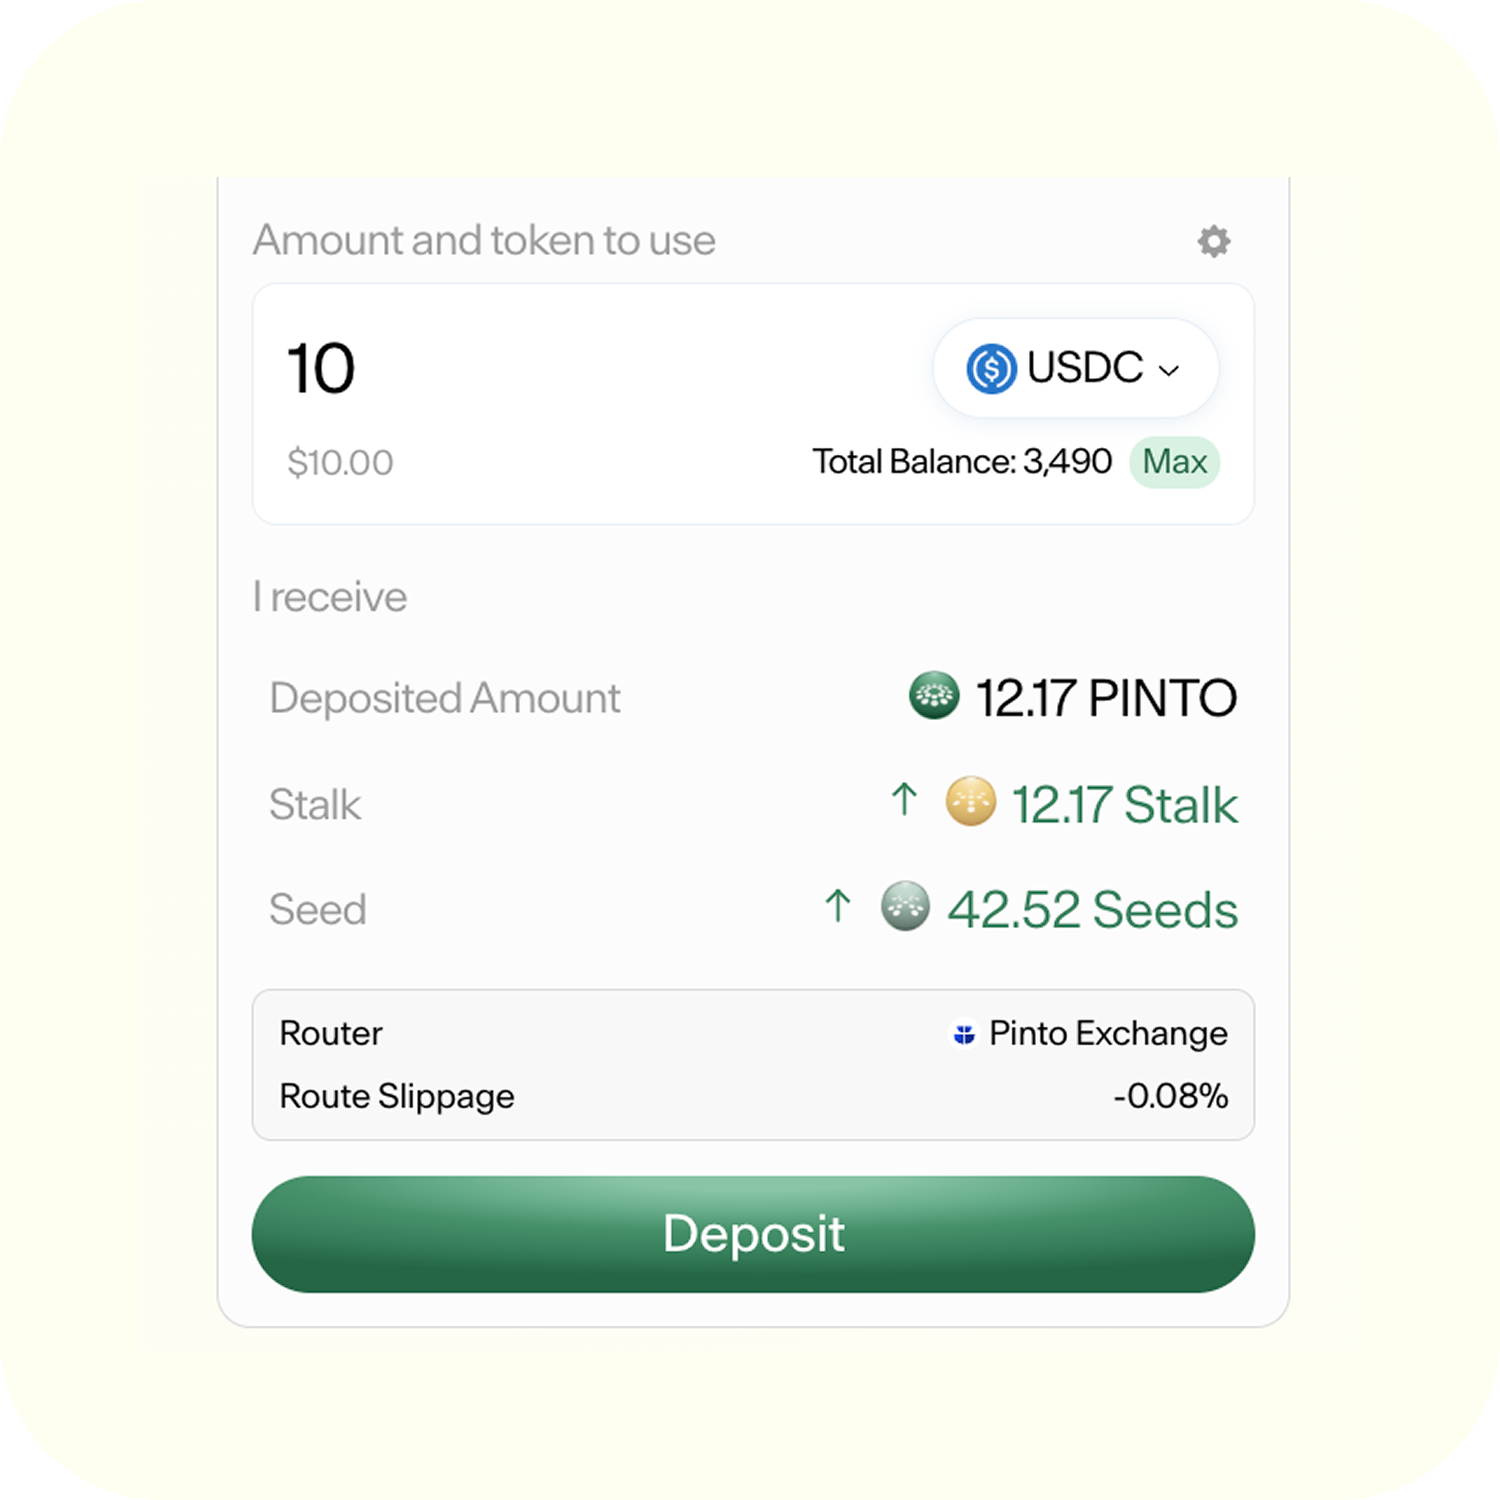
Make sure your wallet id is now in the top right corner instead of “Connect.” Then, put the amount of USDC you want to convert to Pinto in the deposit window. BEFORE you click approve spending, open the wallet app on your phone. With your wallet app open, click approve spending.

This will push a notification to your wallet app and you can then tap approve. Why do you have to approve spending? This is a step that tells the pinto.money system you are ok with the potential deposit. You can think of this as a pre-approval step. Approving the spending does not finish the deposit. So if you change your mind after approving the spending, you can stop there and not deposit, and the funds will stay in USDC.
Once the spending is approved, you need to deposit. The Deposit button will appear on the pinto.money site. Click deposit, and then approve on your phone.

Then click approve on your phone.
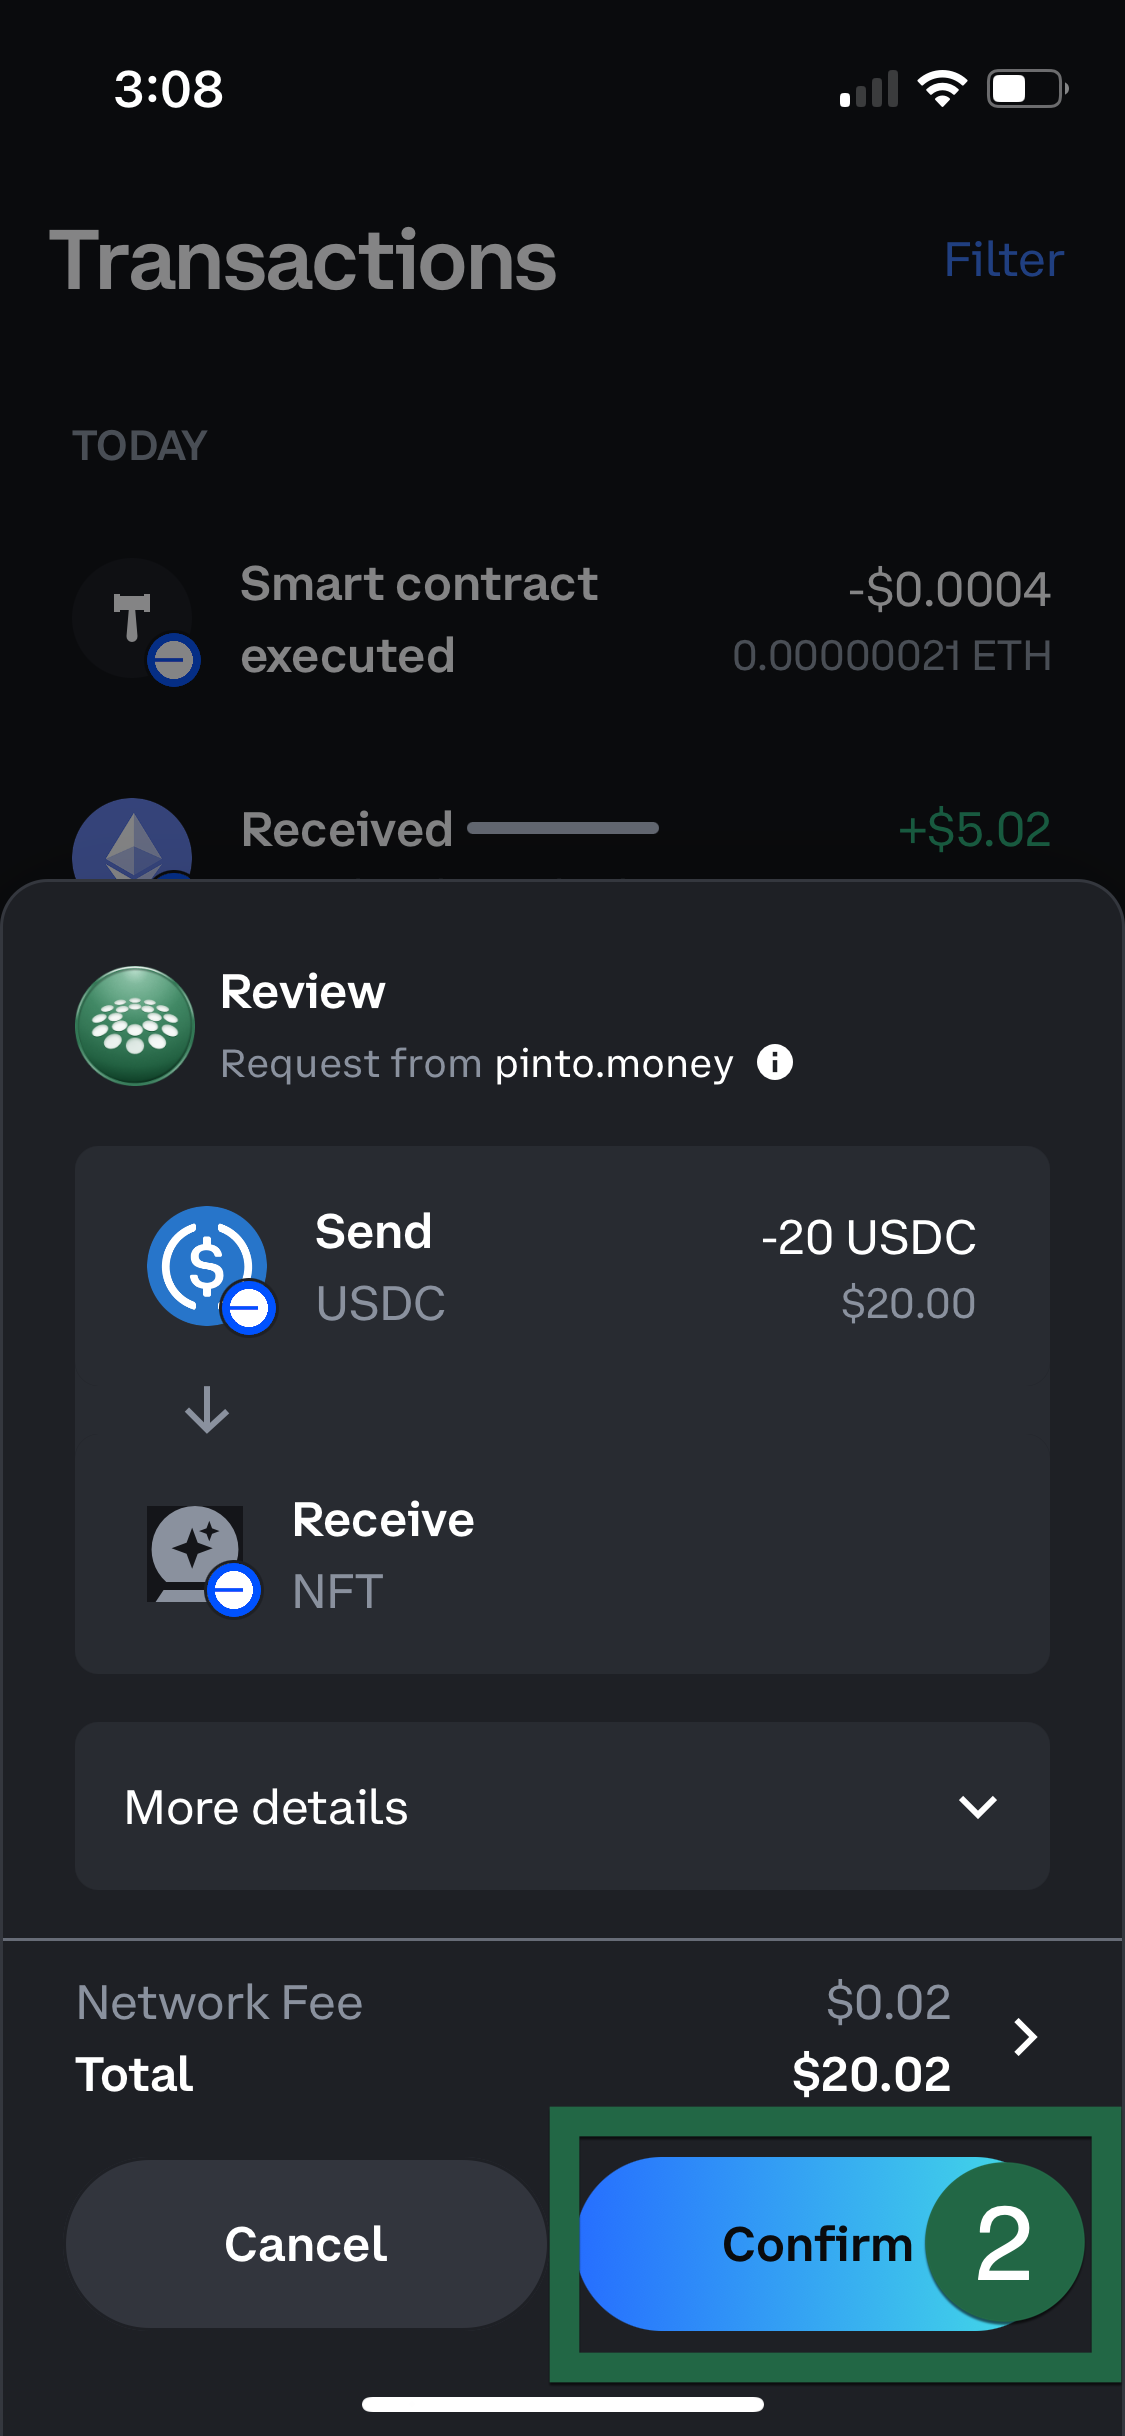
Once the USDC is deposited, you can see your Pinto holding on the pinto.money site.

And you’ve done it. Congrats on buying your first Pinto and happy farming!
This is not financial advice. This website is for general informational purposes only. This website does not provide specific investing advice or strategies to any individual. None of the information or content presented on the website should be construed as an offer to sell, or a solicitation of an offer to buy, any securities, financial instruments, investments or other services. Investing in cryptocurrencies including pinto contains risk. The materials are provided “as is” without any express or implied warranties. Past performance is not a guarantee of future results.
Fast Guide:
How to buy pinto
1. Set up or log into your coinbase crypto wallet

If you already have another wallet you can use that as well. Ensure you have the base network, which comes pre-configured by default.
2. Set up a Coinbase Exchange account
Download the Coinbase app and follow the Sign Up instructions. Add your debit card and verify your identity.
3. Purchase USDC on Coinbase Exchange
Open your coinbase wallet app. From the home screen, select “Buy”.
1. Type $10 (or any amount you want)
2. Click Network and select / search Base, if not clicked.
3. Under “Buy”, select / search USDC.
4. Under “Pay with” select Debit Card
5. Select “Continue to payment”.
6. Select “Confirm & Purchase”
4. Purchase ETH on Coinbase Exchange
NOTE: You need the cryptocurrency ETH to buy PINTO, think of it as a transaction fee. Please note you only need to do this ONCE. This should cover all further transactions of PINTO.
Open your coinbase wallet app. From the home screen, select “Buy”.
1. Type $10
2. Click Network and select / search Base, if not clicked.
3. Under “Buy”, select / search ETH.
4. Under “Pay with” select Debit Card
5. Select “Continue to payment”.
6. Select “Confirm & Purchase”
5. Go to pinto.money and connect your wallet
Use the “Connect” button in the top right
6. Navigate to the PINTO deposit facility
If you already have another wallet you can use that as well
Ensure you have the base network, which comes pre-configured by default
7. Select USDC
Look for Amount and token to use on the right.
Click on the little circle that says ETH or PINTO or USDC.
Select USDC.
8. Choose your amount

Once USDC is selected, select how much you want to deposit into PINTO. We suggest $5 to start.
Click Approve Spending.
9. Confirm the Deposit
In wallet app, follow prompts and approve spending.
Once approved, back in pinto.money website click “Deposit”.
In wallet app, follow prompts and approve deposit in wallet.
You’ve got pinto!

More information coming soon.